On Assignment: Add Light to Reveal Detail
 Yeah, I know it's just a rock.
This is a quick little On Assignment example that I am going to throw in because it illustrates a good reason to throw that little light stand over your shoulder whenever you grab your gear out of your trunk.
One of our enterprising reporters at The Sun was doing a little research and found out that, due to a surveying error about 250 years ago, the county line between Baltimore County and neighbor Carroll County (in Maryland) was not where it should be. It was off by about 100 yards.
As a result, some people who thought they lived in Baltimore County really lived in Carroll County.
Big deal? Well, yeah, if you are the tax collector. Or if your kid is gonna get yanked out of school to be transferred to another county.
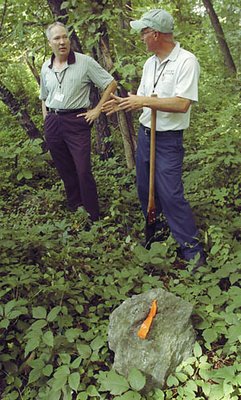
So, I go out with the modern surveyors (who know exactly where they are, to the inch, using fancy GPS interpolating surveying equipment) to shoot the evidence: a 250-year-old misplaced rock.
Well, much like with David Lee Roth, the ravages of time have not been kind to said rock, and the colonial surveyor's marks were weathered and very difficult to see. Especially in the overcast light of the deep woods.
 The photo at left is shot using ambient light, which would not reveal any rock detail that would possibly survive The Sun's
 So to visually prove the point of the story I quickly set a Nikon SB-28 on a stand at a very hard angle to the rock. I moved it around until my TFT screen showed me that the detail if the early surveyor's mark (an "N 6") was very pronounced. (See photo at top.)
This is something you simply cannot do with any type of on-camera flash. Much like the paper detail shots we did in Lighting 101, the hard angle light is what brings out detail and hidden texture.
As a bonus, the strobe really made the colors pop and brought out the texture of the surrounding plants.
The rock close-up photo ran as the lead. Which either said they liked the result, or they thought the rest of my shoot was crap. (I didn't ask...)
If you have been visiting Strobist awhile, you can probably guess my metering technique, which can charitably be described as "Kentucky Windage and Elevation."
Once I got the flash (which was nuking the rock on about 1/4 power from three feet away) at the right angle, the rest was simple.
I adjusted the aperture until the flash-lit highlights looked good, which gave me a working aperture of about f/16. (I cannot remember exactly.) Then, I simply started opening up the shutter speed until the shadows were where I wanted them.
The idea was to get them dark enough to keep the detail in the rock carving, but light enough to have a little detail in the surrounding leaf shadows.
You already have your flash with you when on an outdoor assignment. Just having Pocket Wizards (or a synch cord) in the waistpack and a light stand slung over your shoulder gives you the ability to up the quality level on a simple photo like this.
Next: Guy on a Boat
__________
New to Strobist? Start here | Or jump right to Lighting 101
My new book: The Traveling Photograher's Manifesto
Permalink
<< Home