
Reverse Engineering Other Shooters' Light
So, you've worked your way through most of Lighting 101 (seriously, you're in the home stretch) and you are hopefully starting to get a grasp of basic photographic lighting.
You might not think you are an expert, but you also bring a lifetime of subconscious light analyzing experience to the party. When you see someone standing out in the sun, you pretty much know where the sunlight is coming from just by instantly processing the way the surfaces on their body and face are reacting to the light.
You know whether it is a cloudy day, or a sunny one, or noon, or late evening or whatever. So really, you are reverse-engineering light all of the time. In this same way, you can learn a lot about how a photograph was lit just by looking at it.
That's because light has to obey the laws of physics. You cannot hide how you lit something. Everything about the light — style, color, direction, size, beam spread, etc., — is on display for any shooter with the willingness to figure out.
It may take a little effort at first, but you'll get used to it. And stick to fairly simple photos at first, or just try to reverse-engineer the main (or "key") light in the frame.
True, sometimes photos will be composites or heavily Photoshopped and the light won't make sense. But don't feel bad, as that is likely more of a bad reflection on the photographer who shot the photo than on your engineering skills.

Sometimes when you are creating light you want to have a logic to it. That is to say, you are creating light that could have existed and makes sense. That's the case in the fencing photo, above.
But sometimes you can go off the beaten path and create light that has no real logic but just looks cool, or theatrical or even ethereal:

The key light in those two photos is the same — a speedlight stuck in a large paper Japanese lantern and suspended overhead by fishing line. But the fencer light is believable and logical and the soprano in the woods is more theatrical. I.e., that light is probably not really going to exist in the woods at night.
Either way, most of the time you should be able to analyze and figure out the light that has been used by others. Just look at it and ask questions.
Here are some starters.

Q: What direction is the light coming from?
A: The shadows will tell you.

Q: Were there multiple sources?
A: (Okay, this one is pretty easy.) If the light appears to be coming from multiple places and/or directions, yeah, probably multiple sources. As you progress further into lighting, you'll likely become interested in using multiple lights.
Q: Is the light falling over a small, restricted area?
A: Suspect a snoot, or a grid.

Q: What is the easiest way to check the style of the front light in a portrait?
A: Reflections in the subject's eyes will tell you a lot about the frontal lighting:

Looking at photos can intuitively tell you other things, too.
Q: Was the light nearby?
A: Check how fast it falls off as it travels across the subject. Falls off fast? Probably pretty close. Falls off slowly or not at all? Probably further away.
Q: Do the highlights transition smoothly to the shadows?
A: It was probably a soft light source. Hard transitions signal harder light sources.

Q: Is that light strobe or continuous?
A: Trick question. Unless there is movement over time involved, you can't tell. Light is light. And you'll learn to use that to your advantage.
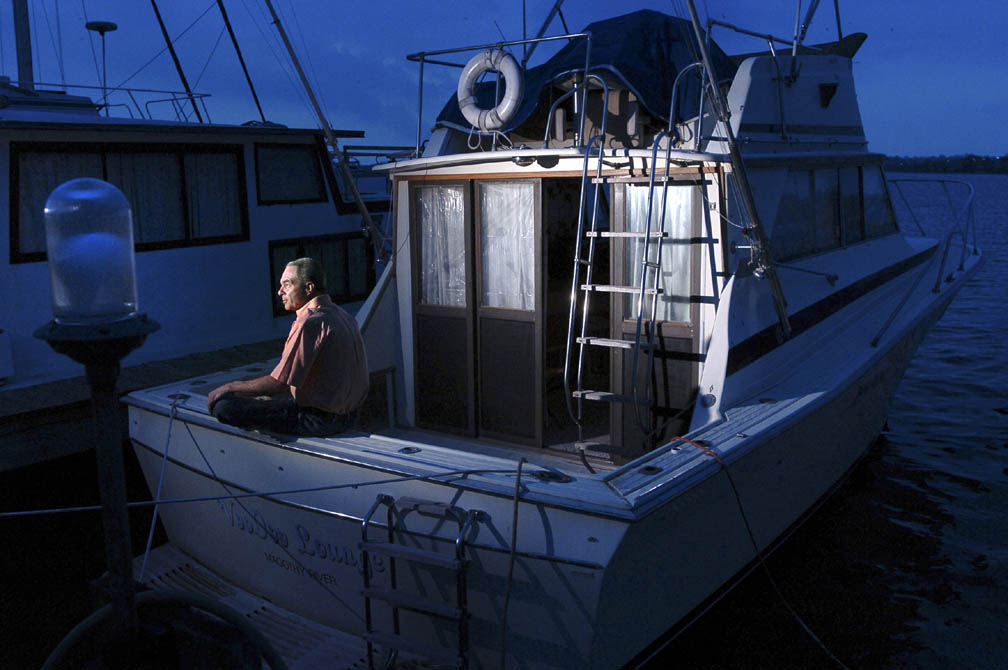
For instance, in the photo above (which was taken in a nearly pitch-black room) there are six light sources: a flash on his face, another filling the entire scene and two in the rafters bouncing off of the wooden ceiling. The other two are the fire and the red-hot metal he is working on. Those count, too.
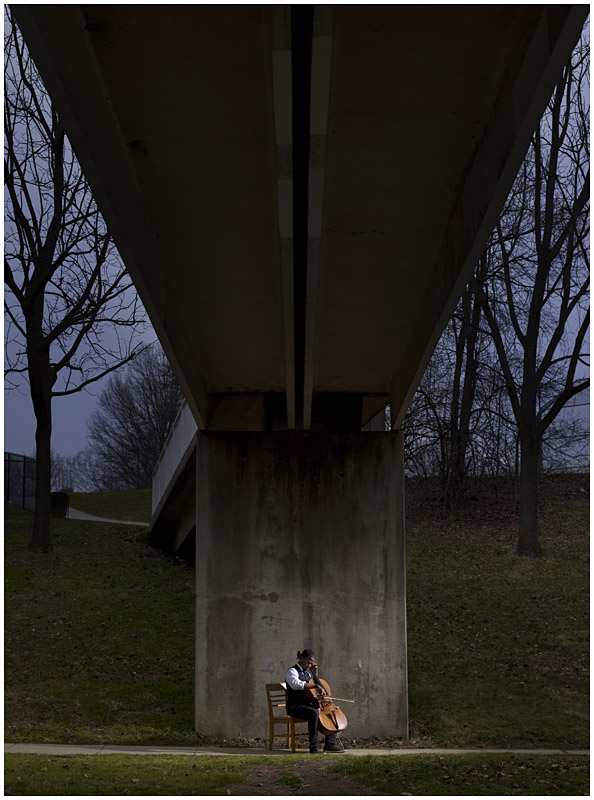
Q: Whoa, how did they get that overcast sky so neon blue?
A: Set the camera balance to tungsten, which renders the formerly neutral clouds blue. Underexpose the sky (to, say, a stop below medium grey) for more of an effect. Then, CTO-gel the flash lighting your subject to render the light hitting it as white and you have the effect. Boom, instant moody atmosphere.
There are no secrets when it comes to light. Only physics.
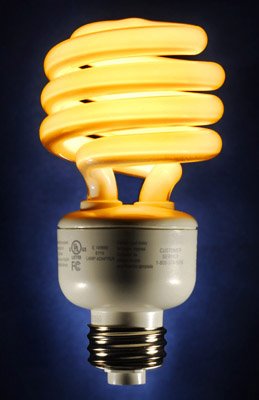
And as for the light bulb image above, it was done completely in-camera — no Photoshop. If you want to take a little side trip and see how it was done, check out the On Assignment post on this image, here. (It will open in a new window, so you can close it and get back to Lighting 101 when you wish.)
Next: Pre-Visualizing Your Light
__________
New to Strobist? Start here | Or jump right to Lighting 101
Now available in audiobook: The Traveling Photograher's Manifesto
Permalink
<< Home