On Assignment: Earth Treks, Pt. 2
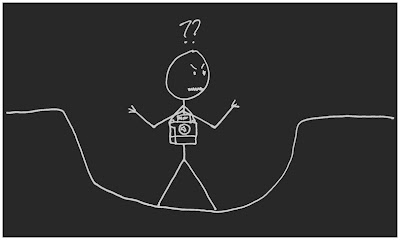
One of the coolest things about the recent Earth Treks shoot was the variety of scale the assignment contained. With the 5-story canyons, we kinda threw everything we had at it and built the whole thing on an ambient base.
But with the bouldering shots, we were essentially lighting a hole -- with a person inside. The geometry of that problem knocked me for a loop on the first day -- resulting in a big ol' FAIL.
But if at first you do not succeed -- try, try again.
__________
Does it separate? Yep, does that just fine.
Does it look logical, or even real? Not so much. Kinda sucks, actually.
And this is something we face as photographers all the time, having to solve our physics problems in a way that makes sense to the people who will ultimately be viewing the photos.
As McNally says, there should be a logic to your light. The light on the photo above … isn't very logical.
Why would there be a light on the ground behind the climber? Easy answer: There would not be.
Okay, enter Plan B.
Fortunately, we still had two more days with opportunities for bouldering shots, so we went back to the drawing board.
__________
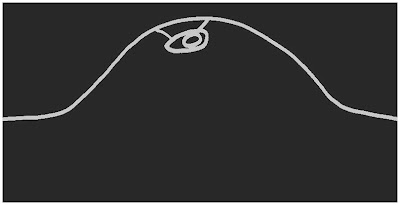
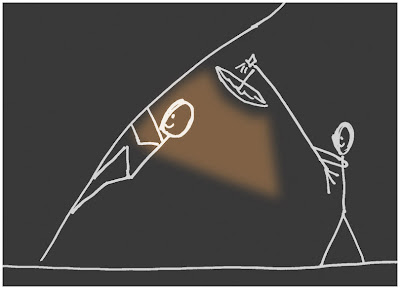
Here is our problem, shown in a stunningly detailed top view perspective of a climber in a bouldering cave. Only there also is a roof overhang which I have not included. From the side, it would look like this:
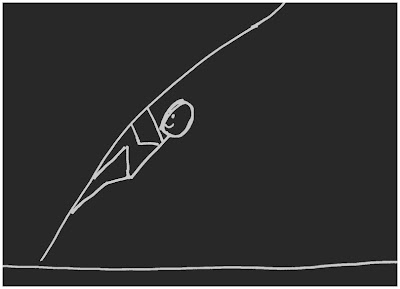
So we decided to establish a baseline illumination on the hole, lit from out in the open space. To do that, we back a hard light way up (for even coverage) and fire it from anywhere the along the arc from which we can see the entire cave. In this case, the hard light was an AB800.
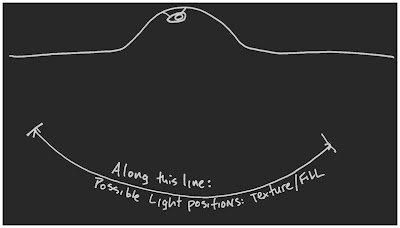
This gives our illumination of the whole hole. We can alter the texture of the lighting by making it back-ish, straight-in, or camera-side light. Then we can underexpose it (after all, it is going to be our fill/texture light) to whatever degree we want. This gives us control over both the texture and the contrast range of the photo.
So, what about our key? Where ya gonna hide that one, Slick?
We realized pretty quickly that the key did not have to come from the front of the climbers. Good thing, too, as there was a bumpy wall about a foot or two away.
If the key came from the top/slightly back, we could catch their faces as they looked up while moved through the holds. We also got nice fill reflections off of the cave walls. And since they moved pretty fast (fricken' monkeys, truth be told) we would have to be mobile.
Enter Erik the WonderVAB (AKA voice-activated boom) and his "special" -- a speedlight in a shoot-thru umbrella. Once we establish how far down we are gonna have the texture/fill light, that gives us a working aperture. (Mind you, the shutter is closed down, as we are doing this all with flash.)
Then, it is just a matter of floating that umbrella out there on a stand that acts as a mobile boom as Erik holds it. Now we can follow the climbers all around with the key light and everything is gonna be just fine.
We then establish a working distance (say, five feet) adjust the light power, and as long as Erik keeps his working distance fairly constant our key light exposure will take care of itself.
The umbrella floating out over the climber is a relative constant, if that makes any sense. It moves with the climber, and keeps the same quality of light and exposure.
So by altering the position of the fill/texture light and the ratio of the key vs. the fill, we can get very different kinds of photos.
The photo has a very low contrast range and looks very natural, because we worked the fill and the key pretty close together in intensity. Maybe one stop difference. Overall, the light does not call attention to itself -- it just does its job.
Again, the umbrella is hanging out above the climber -- orientation and distance fairly constant. A VAB beats a static boom here, for obvious reasons. Less obvious is that Erik will quickly get a feel for what I am doing, and will begin to alter the location of the light to best suit the climber's body attitude, too.
That's why a second set of photographers' eyes (or in this case, a third, too as Dave was assisting, too) is a great asset.
In the end I was very happy with this little mini-revelation. It not only solved our cave problem but opened up a new lighting avenue for contextual portraits, too.
For example, this portrait was taken in almost the exact same spot, with pretty much the same lighting setup. Yet it looks completely different because Erik is bringing that top light "special" in pretty tight/high/back with the umbrella. Ironically, Erik should rightfully get the credit for that photo, as he is technically designing the key light on the fly.
Whereas I am just the button pusher, sucking up perfectly good oxygen.
__________
Next: Earth Treks Pt. 3
__________
New to Strobist? Start here | Or jump right to Lighting 101
My new book: The Traveling Photograher's Manifesto
Permalink
<< Home