New to lighting? Welcome. Start with Lighting 101, linked below, as millions of other photographers have done before you. Or scroll down further to access Strobist's other free courses.
Lighting 101 is the core foundation of Strobist. It is a free, start-from-zero tutorial that will teach you the basics of lighting and minimalist lighting gear. Lighting 101 will have you up and running in no time—and at minimal expense.
Lighting 102 is the sequel to Lighting 101. Where L101 was about gear and basic concepts, L102 will teach you how to further understand and control the qualities of your light to make it do your bidding.
Lighting 103 is a deep dive into color. It explores the intersection of light and color to help you give your photos more nuance, realism and depth.
Strobist Lighting Cookbook combines the concepts learned in L101-103 to give you more understanding and fluidity with your lighting. We also explore some of the shoots from a 360-degree/ecosystem perspective.
A Baker's Dozen: Here you'll find a sampling of posts to help you understand the scope of the lighting education on this site.
On Assignment features full walk-throughs of over 170 real-world assignments, complete with discussions ranging from lighting to concept to execution—and even some screw-ups.
It (largely) follows my path as a newspaper shooter and beyond, progressing from simple speedlights to more complex studio flashes.
Sad fact: There are a lot of companies that make some pretty crappy lighting gear, but are still happy to take your money. The Strobist Gear Guide is designed to help you avoid making many of the costly rookie mistakes I made over the first few years of my career.
This is the gear that works for me, day in and day out. It is solid, reliable and will get the job done without destroying your wallet.
Books are gear for your brain. Chosen wisely, they represent some of the best value for dollar you can spend as a learning photographer.
Featured on the Strobist Bookshelf are my current favorites, winnowed from hundreds of books read over the course of my career. It is a relatively short list, but there are solid selections for nearly any lighting photographer.
Since 2017, I’ve led annual workshops in Cuba and Vietnam focused on thinking like a photojournalist while traveling with your camera. The Traveling Photographer's Manifesto is, in many ways, the book version of that workshop. More, here.
POTW 2/10/07; Still Sans Email
As I continue to try to resolve my no-inbound-emails problem (and to try to work out more London seminar details without that little convenience) I am taking a sanity break to do this week's POTW.
We had some amazing photos this week, including a really cool shower self-portrait.
In the end, I was never able to figure out how much of the look of the photo was due to lighting and how much was due to the HDR post processing. Nothing against, HDR, but this is the lighting site. The HDR blog is down the hall.
Hmm. "HDRist? HD-Arrrrrrrrgh? Someone ought to do a site like that. Any takers?
POTW: Score One for the Skaters
This awesome skateboarding photo, by Ismael Gomez, jumped out at me the moment I saw it.
FWIW, as I look at the 300 or so new Flickr pool photos that pop up each week, I stick cool stuff - pictures, DIY how-to's, etc. - in my favorites folder and go back to them regularly.
All week, I could not go to my faves icons without opening this photo back up.
Talk about having the whole package. Look at all of the things he has going on here:
• He's cross lighting with a pair of Vivitar 285's - hopefully HV's if he is physically connected. I'm telling you, these things rock.
• He's got the warm-flash-vs-cool-ambient thing happening.
• Speaking of the ambient, he nailed the tonal balance. Just nailed it.
• Perfect timing for nice action - this photo isn't just about the light.
• And the ambient/flash combined exposure both freezes and give the smallest hint of motion.
Sweet.
If I was sent out to shoot at my local skate park, I would be totally stoked to come back with this image. And if anyone out there works for Yahoo: C'mon. Little help, please...
Results from Assignment #3, in which you were asked to choose a relatively large object or scene to photograph, and enhance the ambient with one or two small flashes.
Inside, four finals -- two from the U.S., one from Scotland and another from Malaysia. Read more »
Here's something a little different on a Monday morning:
Strobist reader Simon Duhamel, of Montreal, served as Director of Photography for a music video made entirely from still photos for the Canadian rock group, "Aquaplane". The photo seen here is a composite, in which all of the subjects were lit and photographed separately.
The lighting on a set like this is very important, as light helps to sell the idea of the composite once you are finished creating it. Simon worked with a mix of fluorescent lights and AlienBees, which he gelled green to match the overheads. Looking at the background ambient, I presume they just blew them out and desaturated them to kill the resulting magenta shift.
So, why go to all of the trouble to shoot all of these image elements separately? So they could cut and paste them back in and move them around individually in post production. By "sliding" the image elements at different speeds, you can create the illusion of moving through a scene in which time has stopped.
They spent about a month in editing, close-cutting each element so they could slide them around in After Effects, a post-production software package. It's a lot of work, to be sure. But the final result is pretty cool:
If you would like a more detailed explanation of all of the work that went into this piece, Hit the jump -- where Simon explains all.
UPDATE: I'd forgotten about this, but a commenter points out that MediaStorm has a very cool implementation of this technique. It's all the more impressive given that it was done after the fact with a pre-existing set of photos from a trip to Cuba. ___________
Simon says (heh, heh):
This project was initiated by NuFilms.ca Director Gabriel Allard-Gagnon. The inspiration came from old school japan animation. The concept was to shoot separately the Background image and each element composing a frame in order to allow each element to slide in different direction and at different speeds to create a sense of depth and 3D environment, but all coming from 2D images.
The whole project was shot on location with a mix of ambient light and Flash, using Alien Bee units. Knowing that every shot would be the result of a composited image, it gave me a lot of latitude to light each scene.
The background images were shot while nothing was in the frame (no instruments or musicians). For these I was using only ambient light balanced with the fluorescent lights. I then took several bracketed exposures to do a simple Merge to HDR. The Instruments were then put in position and lit with Honeycombs. The general strategy for lighting was to light the guys as if the light was coming from the middle of where they were standing, and we cheated sometimes depending on the background and perspective as to mimic the direction of the window light. A light green gel was used to balance the Alien Bee units with the fluorescent lights. White balance was later adjusted in post, creating a preset in Adobe Camera Raw. The ceilings were also de-saturated in post because they were reflecting too much of the green carpeting.
We had to use Honeycombs to control the light because otherwise, it was spilling everywhere and reflecting on the low ceilings because otherwise we were losing the "ambiance". So I had to adapt and make use of Honeycombs to direct the light only on the models. Knowing that everything would be close-cut in post-production, I wasn't too careful with shadows, knowing that we could get rid of them. A little note here concerning the shadows. If you slow down the video, you'll notice that sometimes, there are no shadows at the rockers feet. We were aware of that, but we weren't looking for perfect realism and we decided that it was "acceptable" given the visual effect we were trying to achieve and our deadline.
On the technical side of things, we had to plan each composition and shoot from further away than the actual desired framing in order to have enough space to zoom in so we could "slide" the image horizontally to create the panning effect. This means loss of quality but given the fact that I was shooting huge raw files from my Canon 5D and that we only needed a 72dpi resolution for output, it didn't really have an impact on overall image quality.
The editing process took about a month. Close-cutting was especially difficult because the green carpeting was reflecting on the clothes and it wasn't possible to use any quick selection techniques. So everything was done manually. The drums were especially difficult as you can imagine. Then each layer was retouched using a technique based on painting to give the whole project a more illustrative look. The images were simply composed of .psd files containing all the different layers to be animated.
The files were then transfered over the Off-Line Editor who worked with the director to create the first draft of the video. The off-line editing was done on Avid. It was then transfered to the Editor who animated all the shots using After Effects. Different elements (musical instruments, casings, sheets of paper etc...) that had been shot at different angles were later integrated in the scenes when everything starts to float in the air along with some 3D models of furniture created for the project.
Finally over my jet lag in Dubai, where the temperature is currently 167 degrees. Although, that's fahrenheit, so that's not as bad as it sounds. The humidity is 132% and the breeze is zero mph. Or less.
But it is totally worth it, as I have been hanging out with the other intructors and learning loads about some really cool stuff without having to pay. More pix and some cool links after the jump.
Dubai is perpetually under rapid construction, with three new skyscrapers popping up in in my field of view during the time it took me to write this sentence. I have met some wonderful folks, and am very much looking forward to meeting those of you who have signed on for the next five full days (gulp) of seminars.
Among the cool people I have gotten a chance to meet for the first time is David Nightingale, of the absolutely lovely site, "Chromasia". As you can see here, David will do whatever it takes to get the photo, even if it means steadying his lens with a huge tripod and his hand with a "Stella" beer...
Seriously, go right now and check out Chromasia. You can see a few of his contruction shots here, here, here and here.
Here is Burj Al-Arab, the totally over-the-top hotel as seen from our hotel's roof. Our hotel is perfectly fine, of course. Until you compare it with the Burj Al-Arab, which is a "seven-star hotel" which is, like, three more starts than anyone else has.
If you have a chance, take a few minutes and explore Chromasia. I am loving David's stuff and wanting to know more about HDR now.
SLC 2L-03: Use Your Second Light to Hide Your First Light
As promised in the last sunset lighting tip, a second quick hack for dusk/lit portraiture. This one involves helping your camera's chip see a contrasty scene more like the way our eye sees it. Read more »
I have not had much time to play with my new ring flash yet, but I can already see that it produces light that is soft, even and strong enough for the kinds of photos I want to learn how to shoot. Click on the pics for larger versions. ______________________
I made this photo at the Patapsco meetup, just starting to experiment a little with still life photos. The leaf was frontally lit by the ring flash, with additional light coming from the top of the frame in the form of an SB-26 lying on the ground firing directly.
I like the ring-light-against-hard-light look very much, and I hope to be experimenting more with it soon.
(More sample photos after the jump.)
Everyday objects take on a whole new look when shot with a ring light as the primary light source. These leaves on the ground -- only lit with ring flash -- have a weird, Photoshopped/HDR look to them. This is right out of the camera, with just the one light. Definitely seeing possibilities there for experimentation.
Also shot at the meetup was Andrew N., the youngest photog present (sporting a modded Poverty Wizard trigger, no less!)
This is done outside in hazy daylight, with the ring flash overpowering the ambient sun. Just a straight, up-against-the-wall shot. And this wall really does not work well for showing the ring shadow, which is subtle with a light source this big.
Victim number two, Justin, shows how the look changes with the addition of one back/side light, which is positioned to miss the background. As with the leaf, this is a look I prefer to the one-light ring shot. With a ring and one or two small accent flashes, you could create a cool painted backdrop and do a neat, themed portrait series.
In fact, being assigned such a series would be a good excuse to build something like this. Or anything else that can give a disparate group of photos some continuity. (You listening, Dana?)
Pathetically, I can report that I have now shot with a ring flash everything in my house that I could find to shoot. This shot of a pair of jeans is ring light only. While I like the 3-D-yet-flat look, I will probably be more interested in shooting against raking lights for most stuff.
Getting in this close, the ring light is really big enough to be considered a "ring soft box" and the light gets flatter. But it is powerful enough (certainly up this close) to be made smaller and harsher with a mask made out of cardboard. That's on the list to try, too.
I was down in Charlotte, NC last week, doing a workshop at The Observer where my friend Bert Fox is the new Director of Photography. During a break I drug out the ring flash and set up a quick, triangle-lit portrait of Shawn, one of the the shooters for the newspaper group.
This is the first chance I have had to set up a couple of additional light sources, and I really like the possibilities I am starting to see with the ring flash as a component of an overall lighting scheme. The background is a white wall in a studio (could be anywhere) and the grey tone comes form the distance ratio (light-subject distance vs light-background distance) which we talked about earlier in Lighting 102.
This is ring flash in front with two gobo'd SB-26's coming from the back/sides. Check it out larger to see the detailed look of the light.
The goal in experimenting is both to start to explore the possibilities and to get the ring flash out of my system, so I will be likely to pull it out at opportune moments instead of on every single shoot for the next six months.
_____________________________________
Questions and Snarky Comments Dept.
You guys aren't exactly the shy type, so I thought I would bring some of the comments and questions from the "how-to-build page" up for all:
So the camera resides inside the tube? Do your arms not hit the sides of the tube when in use? Is the reason for this to keep the lens from vignetting?
The lens is in the PVC tube. The camera is just behind it. The tube, being just a little wider than the shade, can stick out a little bit without vignetting.
How are the flashes triggered? Are rf-triggers required or is it enough to just use the camera's master-trigger (via flash)?
I have triggered several ways so far. PW's (all internally placed) Nikon CLS with the pop-up flash (on TTL and on manual) and PW'ing one flash (either an external rim light or one of the two internal flashes) on manual and slaving the other(s) in SU-4 mode.
The three questions that arise for me, is why the notch in the pvc tube? just for grip or does it serve another purpose? You mentioned that you wanted to do ttl, how can this be achieved accurately with the strobes pointing forward but sensors pointing inwards? Lastly what method did you use to connect the strobes to the camera (main reason for that question is because you said you could do ttl) love to finally see a nicely designed ring flash though.
1. The two notches allow for zooming of the lens with my fingers (side notch), and the top notch allows the pop-up flash to pop up with the body stuck as far as possible into the PVC tube.
2. TTL, when used, means everything comes through the lens before it is measured. Flash/sensor position is very flexible for that reason.
3. See above.
Can't wait to see your pictures (and possible arrest stories) with that thing.
I can assure you that the ring light will only be incidental in the arrest report...
Ummm, how much does this thing WEIGH? How much extra time am I going to need in the gym, training to use it? :-)
It is, shall we say, substantial. Rough guess: 10 lbs, fully loaded.
I'm sorry, the quality of posting on this site have gone way down. I'd pay $400 to not have to carry this thing around.
Your refund is in the mail. As for the size, nothing smaller really solved my design criteria. I wanted to create something that would have the power to use in more real-world situations. It is much lighter than an ABR800 and a Vagabond battery, FWIW.
Could you cut the length in half by turning the flashes around and bouncing into reflectors? Here is a sketch.
I have thought about that, and might play with that a little in further revisions. Nice sketch.
how much light is wasted, bouncing backwards out of the flash, right back into your face, I wonder? Could the back of this be sealed up, and line it with silver tape?
You need easy access to adjust the flashes. But if you wanna try it, knock yourself out. Please send pictures.
Cool design. Is it powerful enough for a sunny day? A little black paint and a Nikon sticker, and it would look almost professional.
It will overpower full sun at modest portrait ranges. And if anyone reading this works for Nikon and has access to Nikon stickers, hook me up and I will pimp it out after painting...
Can't... stop... laughing.
But you're laughing with me, right? Right? Hello?
At least it wont get stolen.
Dunno... I would not leave it alone at a Strobist meetup, I'll tell you that much.
What level of SPF do you recommend for the model?
I generally only photograph models in full burkas, just to be safe. But I do put sunscreen on my face when I use it.
For a moment, light is taking a back seat to creativity. Strobist reader Cohophoto whipped this DIY Steampunk Ray Gun up out of parts from old radios and cameras.
The closer you look at this thing, the better it looks, too. It's just so off-the-scale cool, I don't care how he lit it.
But you can see the lighting setup shot (and a link to the set of assembly photos) inside. __________
In the end, he used HDR and some heavy burning along with the lighting. But again, I frankly do not care. This thing is just too flippin' sweet not to run.
2009 Save-the-Dates: Dubai, Paso Robles and Santa Fe Workshops
In late March / early April, I'll be teaching three classes at a new, expanded Gulf Photo Plus 2K9 in Dubai. More on that full line-up (and an amazing video) after the jump.
Also coming soon is a week-long intensive lighting workshop in California in late April, details of which will be posted shortly. And looking further out, I also will be teaching for the Santa Fe Workshops in San Miguel d'Allende (Mexico) in mid-October. More on those last two when the respective sites go live.
But Dubai is fast approaching, so hit the jump for more on that... __________
GPP 2009
What can you say about Dubai that has not already been said? It's insane. But a picture is worth a thousand words, so check out what The Big Picture had to say on the matter.
I was there last year for Gulf Photo Plus '08, and I am looking forward to getting back for GPP 2009 at the end of the month.
Scheduled to teach this year: Zack Arias, Carol Dragon, Drew Gardner, Chris Hurtt, Chase Jarvis, Vincent Laforet, Bobbi Lane, Cliff Mautner, Joe McNally, Robin Nichols, David Nightingale, Asim Rafiqui and yours truly.
I'll be teaching three classes -- a two-day lighting seminar for beginners, an introduction to headshots class, and a two-day class on self-generated personal shoots with a purpose.
Which pisses me off, really, because I would much rather be off the clock and attending things like Laforet's three-day assignment class, or any of Zack's classes, or learning high-end HDR with David, or draping models on water buffalos with Drew, or anything with Joe. You get the idea.
Chase is even reprising his five-day soup-to-nuts commercial shoot course, too. Last year it was a huge hit -- one of those things that erases a few years of "school of hard knocks" from your career track. It is the full deal: A 360-degree look at a full commercial assignment, from creative brief to preplan to model selection to shoot to post. Everything.
Note that 5am - 8pm sked on the shoot day, too. Heh.
You'll Run Out of Adjectives
I know Dubai is a stretch for most. Would be for me, too, if they were not bringing me in. But if you are one of those lucky souls with some disposable income left, and live in that quadrant of the world, it might be worth a search on economy-depressed airfares into DXB. Emirates Airlines flies there -- in style -- from just about any major international airport. And the onsite hotel (next door, actually) for GPP is significantly cheaper this year because of those empty rooms, too.
If you are rationalizing the trip as a getaway with your significant other, Dubai is a shopper's paradise. (Or hell, depending on who gets the credit card bill.)
The Mall of the Emirates with the indoor ski slope now only barely cracks the top three offerings. My personal favorite is Ibn Battuta Mall, just one of the pavilions of which is pictured at left.
Of course, it has been almost a year since I have been to Dubai which means there is an all-new "biggest mall ever" -- the creatively named Dubai Mall. (Lotta thought went into that, I am sure...) I'll have to check that one out, along with Ibn Battuta again. Not that I am a shop-a-holic. I am mostly in it for the over-the-top cultural/capitalist/visual stimulation. And the air conditioning.
But Dubai's most Freudian attraction is, of course, the Burj Dubai. It will be the tallest building in the world (by a long shot) upon completion this year. If you ever do visit The Burj, skip the stairs and head straight for the elevators for the ride up. I'm just saying.
But for the ride down, you may wish to consider an alternate route:
South African photographer (and Strobist reader) Robert Miller, whom you may also know as "Panascape" on Flickr, has been showing up in PIX African Photo Journal so often he should be paying them rent.
Back in the March edition, Miller wrote and photographed a story entitled, "Welcome to Strobist." He got four pages for his story and another four pages about his photography in the form of a monolith/Q&A piece. Not a bad month.
Then he pops up in my mailbox today with a stitched, HDR panorama with embedded lit portrait on the current, triple fold-out cover -- which is basically a PIX magazine geargasm to the new Nikon D700. (It wraps around to the back cover, too. Craziness.)
We'd never do the ad / cover / fold-out ad thing like that in the States. But seeing that kind of stuff is one of the reasons I love reading foreign photo mags. Even as an old Chinese Wall newspaper guy, I have to admit it is pretty friggin' cool for PIX to announce a long-awaited camera like that.
Links and a diagram, after the jump.
Top Photo: How it Was Lit
Here's the setup for the top photo. Two umbrellas and a ring light. Click the diagram to read more info in Robert's comment stream, where he talks about how he built the flash and ambient ratio for the shot. _____________
As far as my photo, which pretty much looks like a little turd compared to Robert's stuff, I stuck an SB-800 at camera left and exposed for the flash at about 1 stop above the ambient. Location: My mail box.
For more info (and a diagram) on Robert's tri-fold, high-dynamic-range panorama cover shot, check out his Flickr page for the photo.
Last Friday I went out just before sunset to set up and shoot a lit photo of the Wilkins-Rogers flour mill in Ellicott City, MD. It's a behemoth of a building (at least by our local industrial standards) and I was shooting a exterior for their new website.
My plan was to sculpt the building on the rear 45's with flash. And to balance everything (flash, ambient dusk and interior lighting) for a cool, mixed image. At least that was the plan going in.
Instead, this post is about what happens when things head south quickly. Read more »
Around here we sometimes get bogged down in the technical aspects of light. That's okay. This is a niche site and we are not trying to be all things to all people.
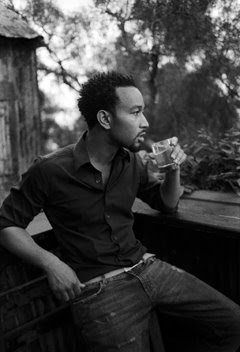
But balance is important in photography, even in the technical stuff itself. So today, we are going full-bore non-technical by visiting with San Diego-based photographer Bil Zelman. His airy, moment-oriented photos are loose, honest and have an unscripted, natural feel to them.
It's almost as if he whips out the old 127 film camera from the '70's, fires from the hip and all of the planets line up. Except that Bil puts a lot of work and conscious thought into making sure all of those planets line up right when and where he needs them.
Video, pix and Q&A, after the jump. __________
I was introduced to Bil's work through an excellent interview in A Photo Editor. In it, he talks about why he engages in pro bono work for selected charities, and what he gets out of it.
I encourage you to check out the interview, even if you do not think you are interested in that type of work. He makes a great case (much better than I did) for the mutual downstream benefits, which are significant.
Appropriately, Bil's style is one that can flit effortlessly between his pro bono charity work and high-end commercial work. Take a look at the following video to get a sense of who he is before hitting the Q&A below.
__________
Q&A
When we spoke earlier on the phone, you mentioned that your initial focus on a shoot is not on light but rather on determining the emotional needs of your subject. You also have very little time in many cases. What kind of an intersection are you looking for during those few initial moments? Are you well-researched or winging it?
Every shoot has different needs. If you're shooting someone with a tight schedule, as celebrity personalities usually have, you've got to be prepared to get a great shot in 10 or 20 minutes -- regardless of how they feel.
It's usually impossible to gain someone's trust in 20 minutes, both in real life and on set. But I try to be genuine and involved in their part of the process as much as possible -- even if it's not necessary. Helping them to make wardrobe choices and showing interest in what color eye shadow the stylist is going with are tiny, easy little things that let people know that I really care about making this photo. And they’re that much more likely to trust my opinions later if I'm pushing them to do something unexpected.
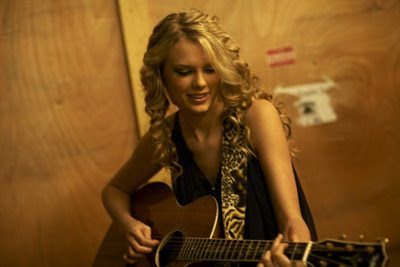
Knowing current things about the person really makes small talk that much easier, and I do try and hold conversation while shooting whenever possible. If what I'm doing is so technical that I can't entertain them, I'll sometimes have a trusted assistant ask them a question or hold their interest. On my first shoot with Taylor Swift, I actually brought a friend of mine who is a guitarist and the two of them ended up playing while I shot.
Shooting good portraits is equal parts psychology, trust and technical expertise -- with the technical part probably being the least important. (I'm going to get hate mail writing things like that here huh?).
Your shooting style is loose and natural, and yet the light always seems to to be working for you in lots of subtle ways. Can you talk about why you frequently prefer to use dark cloths for subtractive lighting rather than working above the ambient with strobes?
For one thing, it's easier and often faster to set up a few black cloths than to drag out the packs, heads, modifiers, run power cables or generators etc.
I easily own $25k in lighting gear -- Speedotrons, Dynalite, Elinchrom gear etc, -- and often pack it all into a cargo van and bring it along just in case. But the best results are often found more simply. If I can find nice flat light, and sculpt it into something more contrasty and dimensional, it looks a lot more natural. I don't have to worry about staying within shutter sync or using ND filtration to knock things down, waiting for recycle times or having all those incredibly annoying flashes going off and ruining the mood. (Sorry Strobists!)
And don't get me wrong- There's a time and place for strobe, but it's only a tool and there are lots of other ways to work. In order for me to achieve a very natural looking light source with strobes and still have room for my subject to move around, I'd need HUGE light banks like the ones car shooters use.
I remember that you specifically had it in for "green uplighting," as you called the light reflecting off of grass outdoors. That is to say that you love to kill it with a dark cloth on the ground. Can you really help shape someone's face with just a black cloth on the ground?
Absolutely. Everyone ends up shooting in mid-day sun and positioning their subject in the shade of a tree at sometime or another. When that person's standing there they have two light sources: The blue light coming from the sky above and a bright green light coming from the sun hitting the grass below. You can't color balance for them both. What ends up happening is you set your white balance or filtration to warm the scene and take out the blue main light, and leave this bright green "up light" under their chin and in the sockets of their eyes, etc. I see it all the time in print.
Throwing a cheap black cloth on the ground in front of them not only corrects the color issue, but it also gives the lighting more contrast on the vertical axis. Which, in turn, gives everyone a better looking chin line, which makes people look thinner, etc.
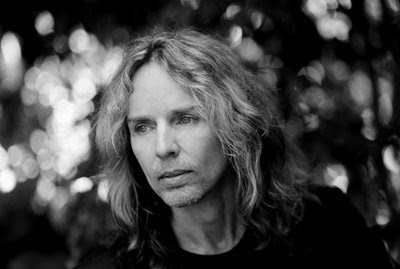
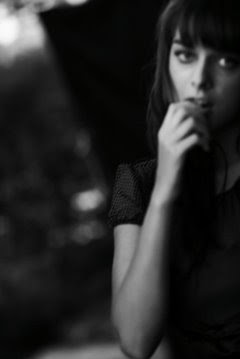
Ideally, in this situation I'd throw an 8x8 cloth on the ground and set two black 6x6 scrims on either side to bring out their cheek bones. This configuration is the one use on the Tommy Shaw portrait and the blurry female model as well -- both of which were shot in backyards in "normal shade".
For the record, I had a sail maker sew pieces of black Duvateen together into 8x8, 12x12 and 18x24 configurations, along with grommet holes every 16 inches which can then be tied to regular background stands and raised. Scrim Jim makes great frames, although they're pricey and there are other options. You could buy black cloth anywhere and have someone hand hold it, throw it over two ladders -- whatever. The camera won’t know you didn’t have a sail maker sew them up.
Also, black felt is actually shiny at a forty-five degree angle and doesn’t work very well. Stick with the dull stuff the movie industry uses like Duvateen if you can.
One thing you said in an earlier conversation really stuck with me: "Focus is overrated." As a long-time news / sports shooter, that kinda made my head explode a little. But at the same time, the look resonates. What is it that will make you decide to veer so far away from convention on a shoot? Do you play it safe and shoot both ways? That must take a lot of confidence in your personal vision -- how do your clients react to this?
This brings a smile to my face. One of my best commercial clients has often offered to pay me more if I’ll make more of the images sharp. But I still like to shake the camera...
As far as blur goes there are all kind of beautiful things you can do with it. (But please, no more 1995 ”pop-the-flash-and-drag-the-shutter stuff”). You see it in great work everywhere from Richard Avedon to Sally Mann to Robert Capa.
Like anything, it’s a style thing. Standing still and racking your lens out of focus probably won’t be very interesting. But if you're walking backwards and you're subject is waking towards you and you're shooting at a 30th with a 50mm, you’ll probably get frames where the person has motion blur and the background doesn’t and vica-versa. This can bring a lot of excitement to a shot, separate the subject from the environment and also give your subject something to do other than stand there and look at you. Make your subject DO THINGS.
One of my favorite looks is shooting T-Max 3200 and shaking the camera while I shoot. The image comes out soft, but the large grain gives your eye something to focus on when you’re viewing the print. Visual texture is something fine print makers used to talk about all the time, from grain structure modification with developers to darkroom paper choices. But most of those things are now overlooked. Blur can be one of them.
I’ve kept my Nikon D2x solely for it’s awful noise at high ISO for just these reasons. It can be painterly and gorgeous with the right subject matter.
In general, many of your photos are stripped of the Nth-degree technicals and are built entirely on emotion and moment -- a leap of faith that is impossible for many photographers to make. How did you make that jump? A little at a time, or all at once? How has it changed you?
You know, this is so hard to answer!
I’ve always shot very quickly and playfully with a lot of direction and background changes. I don’t believe that there’s a single image on my website that’s been cropped at all, and I’ve always been that way.
I take the kind of photos that don’t really need much screwing around with, I suppose. And I wouldn’t be the guy to do it if they weren’t. Photoshop was something I resisted using for years, but I’m now pretty good with it and clean things up and sometimes remove things and such. But I would never use it to try and make a dull photo interesting -- which we now see a lot of.
People have been making remarkably impactful images for 150 years without HDR or high pass filters and I suppose I’ll end up being one of them. Perhaps I’m boring?
Don't take this the wrong way, because it is meant as a compliment: In many ways, your work has evolved (or maybe regressed?) into a look that is almost childlike. Like those projects that give cameras to a group of kids and edit the take down to beautiful work that is free of convention and restriction. If you could talk to yourself as a photographer 20 years ago, what advice would you give?
Can we say naiveté in place of childlike? I once had an art history professor refer to the naiveté of Julia Margaret Cameron's work and I thought it to be so poignant. I don’t believe I’ve even thought of that moment until now, but it’s interesting because she played with focus and blur and time exposures and was largely ridiculed for it. But try and purchase one of her photos now!
I suppose I’ve always wanted to believe that some photos are real, and leaving in a few mistakes and not being technically obsessed helps me with this. It’s almost as if I’m documenting my own photo shoots if that makes any sense at all? Method acting and letting people be who they are. (You can actually see one of my black cloths and stands in the blurry shot of the girl...)
If I had to give advice to anyone at all, it might be to know your tools inside and out, but not let them get in the way. I can go from a 125th to a 30th and from f2.8 to 5.6 while walking backwards and holding conversation without missing a beat. Add too much more to that equation and I’m paying more attention to my gear than to my subject -- not a good thing.
That, and take lots and lots of pictures. __________


 This awesome skateboarding photo, by Ismael Gomez, jumped out at me the moment I saw it.