Lighting 101: It's Not (All) About Flash


Guess what? You made it all the way through Lighting 101. This is the last lesson.

And you are probably a little stoked about your new-found skills. You might even already be playing with your starter kit. (If not, you are totally ready to.)

So I am going to suggest something to you that may sound a little strange:

It's not about flash.

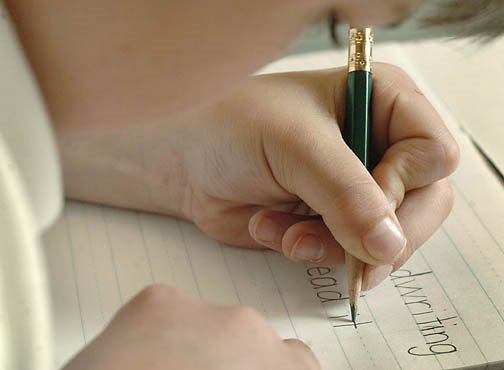
Photo-graphy is, literally, writing with light. That's what we do. And you have just enough flash and lighting knowledge right now to be pretty dangerous. Because your photos are going to look better, more polished, more professional, etc.

But don't make your your photography all about off-camera flash — or even all about light. It's also about content and moment and emotion and gesture and setting and, yes, light. But the point is that it is not all about light. And certainly, it's not all about flash.

Lighting is a tool. And you are learning how to use it. But it is important to make your lighting knowledge additive to your previous existence as a photographer and not a substitute for all of those other cool skills you used to bring to the table.

In other words, use your new and growing skills to nurture your own existing skills as a photographer. Don't let lighting take over and subsume your creative vision.

The very last thing I want to do is to kill that individuality you had before you got here. Just let lighting make it better.
__________


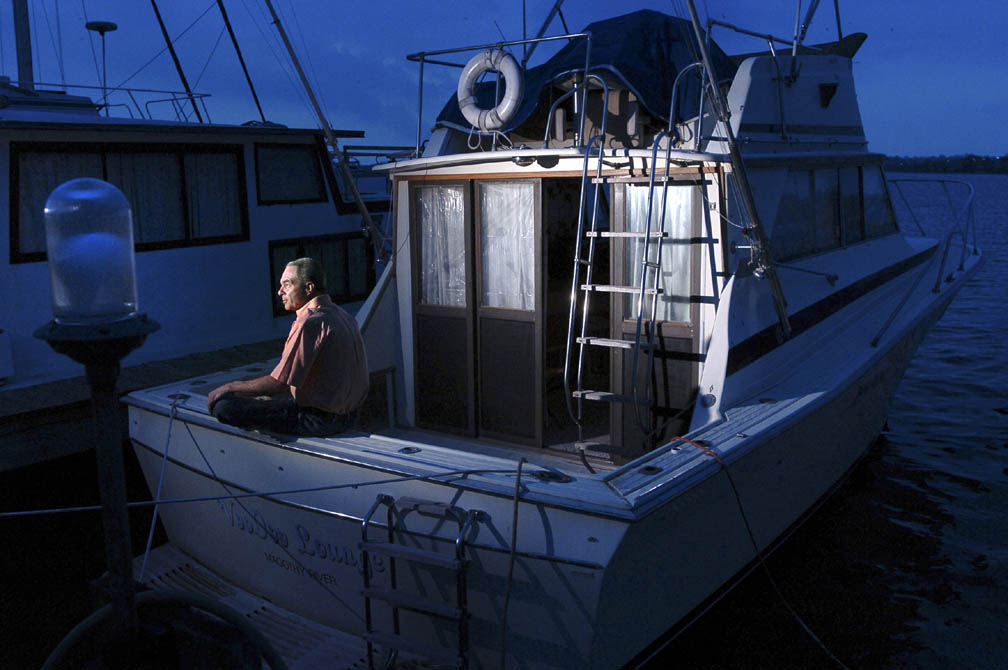
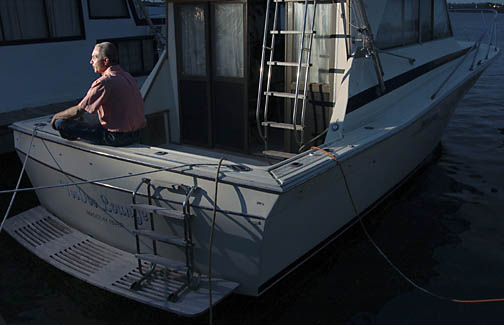
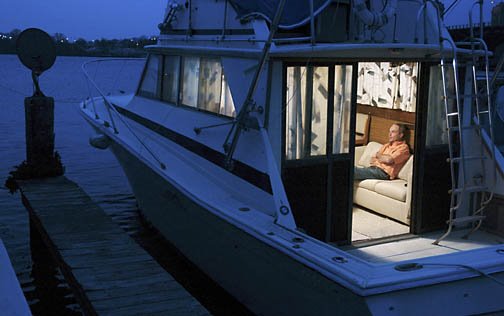
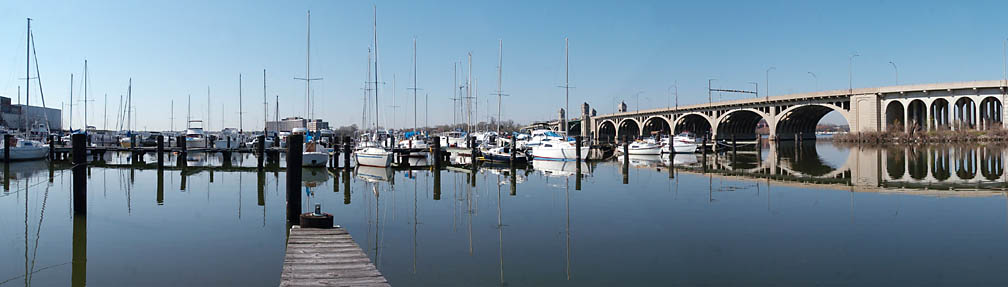
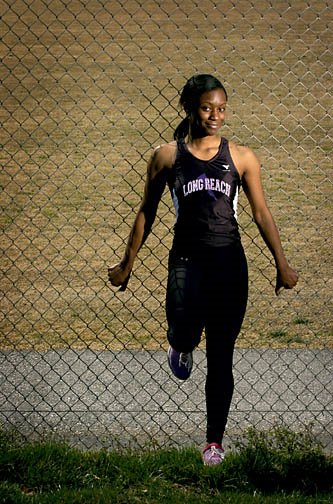
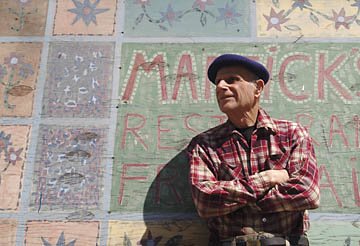
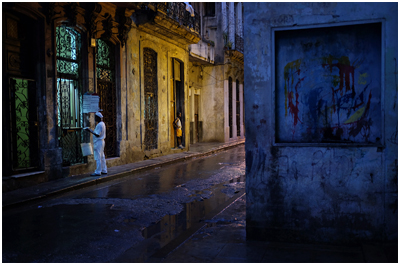
Also, take time to just look at light. I mean real, ambient light. Daylight. Industrial light. Blue hour light. Golden hour light. All kinds of light. Discover it. Study it. Wallow in it. And make sure you keep shooting with natural light, too.

Because a little further down the line, you are going to be able to recreate any kind of light you can imagine — even that amazing light that I came across my first night in Havana, seen above — with your flashes.

That's coming later.

But right now, take a moment to congratulate yourself. You have completed Lighting 101 and are now ready for Lighting 102.


Next: Lighting 102


__________

New to Strobist? Start here | Or jump right to Lighting 101
Got a question? Hit me on Twitter: @Strobist
Have a passport? Join me in Hanoi: X-Peditions Location Workshops


Permalink

Hook a Pocket Wizard to Any Hot-shoe Flash

Two readers, Alan and Nick, have sent in this useful tip for anyone wanting to hook up a Pocket Wizard to a hot-shoe flash. Any hot-shoe flash. Even a Canon hot-shoe flash.

The PW-MHSF1 Miniphone to Hot Shoe Female cord connects the receiver directly to a hot-shoe on those PC-deprived Canon strobes. (You listening, Canon Honcho Chuck Westfall???)

They are $39 bucks and should get you a reliable connection. You could even make yourself a full synch cord using one, I'd expect.

Of course, if you scrounge a tad, you can probably find an SB-24 PC-enabled strobe for $39 to keep as an off-camera flash, (but I would never bring that up...)

Nick also suggested I mention Chimera strobe speedrings for softboxes, for when you wanna hook your little flash up inside a rectangular soft light. (I used softboxes so much in the 90's I have kind of turned on them. But that is just me. My left eye is starting to twitch a little just thinking about it...)

But Nick is right, and I will look into some small strobe mounting options for those light-sucking popular, versatile little light modifiers.

Thanks, Alan and Nick!


__________

New to Strobist? Start here | Or jump right to Lighting 101
Got a question? Hit me on Twitter: @Strobist
Have a passport? Join me in Hanoi: X-Peditions Location Workshops


Permalink

On Assignment: Simple Wall/Snoot Portrait

The longer I play with my small strobes, the more I graduate away from soft light.

There is a time and a place for the umbrellas. But, increasingly, I find myself using hard light. More specifically, I find myself using restricted beam light.

Hard light has a bad rap, as we talked about in Lighting 101. The trick is controlling the ratio of the strobe's light to the ambient.

This quickie portrait was a Varsity cover of a state champion high school wrestler who was returning to spend another season embarrassing his would-be opponents.

The snoot-against-a-wall technique is a trick I go to frequently when I am shooting an athlete in an indoor environment. The result is basically a photo that burns its own edges down. The severity of the falloff is determined by (Anyone? Anyone? Bueller?) the shutter speed. The higher it is, the darker the falloff. Remember - assuming you are within the synching range for your camera - the flash only cares about the aperture. The ambient is controlled by the shutter/aperture combo. So keeping your aperture constant and decreasing the amount of time your shutter is open does nothing for the flash-lit area of the frame, but drops the value of the areas the flash is not reaching.

Why use a wall? Well, as you can see here, the wall provided a nice fill reflector for the camera left side of his face. It is amazing how much light you'll get back from a white wall at close range. Even if the wall is not in your frame, you can use it for fill light. One strobe becomes two lights that way.

So, if you have been reading the articles, the light position, modification and exposure process should be coming to you already.

I have a Nikon SB-28 on a stand about 8 feet away from the subject at camera right. I slipped a home-made, 8" cardboard snoot onto the flash to restrict the beam of light. The flash is on manual. I am purposely not going to tell you exposure info this time because the actual numbers should be getting increasingly irrelevant to you by now.

Here's the process:

I tend to start with the flash set on manual at a quarter power. I was working in sodium vapor lighting, so I greened the flash and shot on the camera's florescent white balance to get close to the ambient color temperature.

Working at a quarter power (at 400 ASA) I start with the camera on the max synch speed (1/250th with a Nikon D2.) I adjust the aperture while doing a series of test exposures until it looks good. Then, I shoot a few more test exposures, opening up the shutter speed until my falloff looks the way I want it.

(If this is confusing to you, you are probably jumping in late. Might want to go into Lighting 101 or On assignment and read some.)

This is a very quick, flash-meter-less process (hey, do you know how much cool lighting gear you can get for the price of a flash meter?)

My target was to use the beam of light to call attention to him, yet make the falloff such that you could still read "Hammond," the name of his school.

By the way, a good friend of mine always thought that Hammond High School should change their mascot to the "Hammond Eggs." (Yes, I have strange friends.)

So, there you have it. A super-quick, one-light set-up that can be used in a pinch almost anywhere. It is a bit of a gimmick, so it is not the kind of thing you want to do once a week. But it is nice to have a couple dozen "gimmicks" that you can pull out and choose from when you need them.

Oh, and while I am thinking about it, I have to remember that I now have found I have readers from (among other places) South Africa, the Philippines, Japan, Finland, England, Brazil, Romania and Alabama. So, the reference to "Bueller" is from a 1986 US movie called "Ferris Bueller's Day Off." Several lines from the movie are common slang usage here in the US, but they might not make any sense to my new friend Christian from Romania.

Stick with me and I will corrupt your English in ways you never thought of.


Next: Make the Ambient Work For You


__________

New to Strobist? Start here | Or jump right to Lighting 101
Got a question? Hit me on Twitter: @Strobist
Have a passport? Join me in Hanoi: X-Peditions Location Workshops


Permalink

On Assignment: Dealing with TV's and CRT's

A little while back I was assigned to photograph the CEO of a television network which shall remain nameless. We'll just refer to them cryptically as The "D" Channel.

I shot the CEO near a bank of TV's, and I want to take this opportunity to talk about some of the problems and solutions for dealing with the little buggars. (TV's, not CEO's.)

There are several things you have to remember when shooting TVs/CRT's, and I want to walk you through one thought process you can take when you come upon them.

The first two things you need to remember are to (a) kill the ambient, and (b) get to a shutter speed of 1/30th of a second or longer.

The ambient cannot always be controlled. But you want to get it as low as possible because the CRT's are basically light sources. The tone of the "turned off" CRT in the room's existing light is the darkest tone you will possibly be able to get for your richest black on screen when the CRT is turned on.

This is to say that, if the TV is a medium grey value in the room light, that is the deepest black you will be able to get in your lit photo of the functioning TV.

To get the ambient down, turn off the room lights if you can (duh). Also, try to shade any windows by drawing the curtains or blinds.

Once you have the TV (or computer CRT) in as dark an environment as possible, turn it on. Meter through the lens at the TV, with the picture filling the frame.

Here's where the 1/30th comes into play. Set your shutter there, because that is the fastest shutter speed that will get you a complete scan cycle of the cathode ray, which "paints" the screen about 30 times a second. That's why you get little stripes at, say, 1/125th or 1/250th. Luckily, this is not the case for most of the flat-paneled monitors we are using more and more these days. But they are dim enough where the slow shutter speed is usually gong to be used anyway.

Now that you have your shutter speed set, adjust your aperture for best exposure. If you cannot get the f/stop opened enough for a good exposure, drop to a 15th of a second. Or an 8th. You get the idea.

This full-scan, ambient light exposure will be your working exposure for the whole photo. This is why you want the turned-on TV to be the brightest thing in the room. Your subject will be darker, and you will have to adjust your flash to raise the subject to balance with the TV. Fortunately, you are not afraid of a little manual flash now and then, Right?

The last thing to remember about CRT's is that they are rounded, which means you may have to work a little creative lighting geometry to hide the flash's reflections in the screen. One tip is to stick your flash behind the monitor and shoot in profile like we did in the final shot in "Abstract Concrete," earlier.

OK, so back to The "D" Channel lady.

We got the room as dark as possible, which was "not very." This means that my blacks on the monitor were not as rich as I would have preferred. But as long as you know how to do it, that is what is important. The monitors filled the wall on the left, so I brought my Nikon SB-28 strobe (on a stand, in an umbrella) around closer to me (on the right) than I normally might have. This got rid of my flash reflections in the TV's.

The TV's were around 1/30th at 2.8 at 400 ASA, if memory serves. (This is usually about where they hit, and a good starting point for guest-imating.) The actual exposure is less important than knowing how you get there. Then I just dialed the flash down on manual, checking the TFT monitor as I went, until she looked balanced.

I know this sounds like a lot if you are new to it, but it really is not. Here it is again, in a nutshell:

1) Get the room as dark as possible.
2) Using 1/30th as your maximum shutter speed, get your exposure, based on the TV screen - right through the lens.
3) Adjust your flash to balance the subject.
4) Angle your flash to avoid TV reflections.

Computers (and TV screens) are a fact of life, and hardly a week goes by that I do not have to shoot someone in that environment. Learn to do it well, and never worry about it again.


Next: Simple Wall/Snoot Portrait


__________

New to Strobist? Start here | Or jump right to Lighting 101
Got a question? Hit me on Twitter: @Strobist
Have a passport? Join me in Hanoi: X-Peditions Location Workshops


Permalink

Found: Vintage Nikon Flash Heaven

Ain't the web great?

I spent a little time Googling "Nikon SB-24" and some other models, looking for a site that might have a little chart comparing them, and came across a wonderful Nikon fan site run by a guy in Malaysia. It has a full page dedicated to each of the flashes in the Nikon family tree.

It has detailed descriptions of all of the older Nikon flashes that you can use when you are cruising eBay for some bargain off-camera lumens and photons.

Below are several direct links to many of the most appropriate Nikon flashes. These all have PC connections and manual control, so far as I know.

If you are into the old Nikon scene, explore around his site a little. It's a hoot.

SB-24 | SB-25 | SB-26 | SB-27

SB-28 | SB-800 | SB-28dx | SB-80dx


More recent stuff here:

Nikon Flash Comparison Chart

And, just for fun:

A Pictorial History of Nikon Cameras


__________

New to Strobist? Start here | Or jump right to Lighting 101
Got a question? Hit me on Twitter: @Strobist
Have a passport? Join me in Hanoi: X-Peditions Location Workshops


Permalink

Word Verification in Comments Set to "Off"

Believe it or not, even I have to try to read those sloppy drunken verification letters to post a comment. It is a pain, and I am turning it off to see how it goes.

(Apparently there are issues with "comment spammer bots," which raises the question of what anyone would possibly have to gain from such an activity.)

We'll see if the bots descend onto Strobist and trash the place. Or, maybe they'll raise the level of discussion. Who knows. But as for now, enjoy your commenting in a "squint-free" environment.

(And don't say I never did nuthin for you...)

EDIT: The comment bots found Strobist within a few hours of this post. Amazing. Oh, well. Word verification is back on. And, BTW, it is good to see a discussion starting to build in the comment section of many of the posts.


__________

New to Strobist? Start here | Or jump right to Lighting 101
Got a question? Hit me on Twitter: @Strobist
Have a passport? Join me in Hanoi: X-Peditions Location Workshops


Permalink

Steal This Flash - The Nikon SB-24


The SB-24, a late-1980's model Nikon speedlight, can be had for as little as $35 on eBay. This is an insane deal, relatively speaking. UPDATE: The days of the $35 Sb-24 are gone forever, thanks to you guys. You can expect to spend $75-$100 now. Sorry.

UPDATE #2: (And this one is better news) You can get a manual for the flash here.

__________


Look at what you get:

• Full manual control, in whole stops, down to 1/16th power.
• An industry standard, external PC synch
• Internally power-zoomed flash head, covering 24mm to 85mm beam spreads
• A jack for an external high-power battery for one-second, full-power manual recycle times.
• Auto and TTL functions, which to us are pretty useless. But if you have a Nikon F4, or N-8008s, knock yourself out.
• High build quality - this was a $200 flash in 1985 dollars.

Dollar for dollar, this is tough to beat for <$50.

Even if you are a Canon shooter, this thing is a no-brainer to snag and make your "off-camera" light. Just keep it in a separate little bag with one of the sweet little 5-section Bogen stands, a double folding umbrella (with stand adapter) and a sych cord, and you are ready to roll.

The Nikon SB-25, -26, -28, -28dx, -800, etc., all offer those same features - and more. And they all get progressively more expensive. (If you see one of these on the cheap, grab it.) But the SB-24 does what you need on the cheap.

These are all well-built, reliable flashes. But the price makes made the Nikon SB-24 a steal.


__________

New to Strobist? Start here | Or jump right to Lighting 101
Got a question? Hit me on Twitter: @Strobist
Have a passport? Join me in Hanoi: X-Peditions Location Workshops


Permalink

Consulting

Are you developing a product that intersects with the world of lighting?

After 20+ years of daily shooting and lighting experience as a staff photojournalist, I founded Strobist.com in 2006. For the last ten years running Strobist has put me squarely in the hub of the professional-amateur continuum in all things lighting, intersecting daily with photographers all around the world.

Whether you are in the planning or design phase of a strobe, studio flash, remote trigger, lighting modifier or even a piece of lighting grip, I can help.

I have helped companies create intuitive user interfaces for remotes and flashes that reflect a deep knowledge of the way customers will use their gear in daily workflow. I have helped companies look beyond a juiced guide number rating when designing a reflector for a portable studio strobe.

Put simply, I can help to keep your company from making expensive mistakes—and do so in a cost-effective way. To inquire about remote or in-person consulting, please contact me via email.


__________

New to Strobist? Start here | Or jump right to Lighting 101
Got a question? Hit me on Twitter: @Strobist
Have a passport? Join me in Hanoi: X-Peditions Location Workshops


Permalink

Money Choices: Light or More Glass

Starting out as a photographer has never been an inexpensive proposition. But things have gotten downright crazy in recent years, with pro digital cameras going for $3,000.00, flash prices that look like car payments and long glass that can cost as much as you could possibly want to spend.

It's enough to make you want to cross over to the dark side and be a reporter. What do they need, a pencil? Maybe a $500 laptop?

But then, we have way more fun than reporters, don't we? So we pay.

When I think back at how I spent my hard-earned photo-gear resources when I was starting out, it makes me cringe.

It was all about bodies and glass. Especially long, fast, expensive glass. After all, those guys who always out-shot me had 300/2.8's. So that must be the solution, right?

Well, by the time I found out that the fast glass was not what made them better than me, the financial damage was done.

Knowing what I know now, I would have approached things very differently. I would have started off with a low-end body, a cheap 50mm f/2 (or f/1.8) prime lens and a modestly priced (slower) do-everything zoom.

The 50mm would give you the speed - and a focal length worthy of exploring - for under $100. And the zoom would cheaply fill in some focal length gaps while you got your feet on the ground.

After that, I would go straight to a small light kit. For less than the price of even turning that f/4 zoom into an f/2.8 model, you could be set with a small-strobe, off-camera light.

And don't even get me started on the idea that every young shooter needs a 300/2.8. Sure, they do some things very well. But they also tend to funnel you into a certain way of shooting while they suck your wallet dry.

I recently got a chance to meet and chat with one of my long-time photo compass points, David Burnett. He shares my disdain for 300/2.8's as a God-given right for young shooters. He thinks the lenses force them into a constricted way of shooting - and not a very good one at that.

It is not that they are bad for you, per se, but that they tend to close off so many more interesting visual avenues while you are still young and impressionable.

And then there is the cost, which makes them preclude just about everything else when it comes.

So, if I can dissuade you from making the early jump to long, fast glass - even for just a little while - it will pay dividends to you which will prove useful now and in the future.

The body and some glass are an unavoidable expense. But the light is relatively cheap. I have an article I am working on detailing a ~$175 off-camera light kit: flash, stand, synch, umbrella, etc., included. Sadly, that falls into the "pocket change" category for photo gear.

And the learning-how-to-use-it part is free, now that we are digital and have no film expense. But you have to work at it while you build some techniques you feel comfortable with.

As you grow and learn (and cash some checks from assignments) you add the second body, a fast wide zoom and a fast tele zoom, and you are set. But the light kit gives you the ability to be making higher-quality photos right from day one.

Provided, of course, that you learn how to use it.

Honestly, you really didn't think I was going to suggest you go out and buy a lot of glass first, did you?


__________

New to Strobist? Start here | Or jump right to Lighting 101
Got a question? Hit me on Twitter: @Strobist
Have a passport? Join me in Hanoi: X-Peditions Location Workshops


Permalink

Don't Miss: Bill Pierce's "Nuts and Bolts" Columns

Every paper's photo department has some guy who has been around since glass plate negatives were in vogue and can talk for twenty minutes on any piece of equipment ever made. Not to make him sound older than he actually is, but Bill Pierce at the Digital Journalist is one of those guys.

If you are looking for a few hours to kill reading a collection of been-there-done-that perspectives on just about anything that has to do with the equipment end of photojournalism, he's your guy.


__________

New to Strobist? Start here | Or jump right to Lighting 101
Got a question? Hit me on Twitter: @Strobist
Have a passport? Join me in Hanoi: X-Peditions Location Workshops


Permalink

On Assignment: A Guy on a Boat

Every now and then at The Sun, someone from features will come up to a photog and say, "We're looking for something... conceptual."

Translation: We have thought and thought about this story, and we cannot come up with a single idea we can box you into.

What I hear: Try anything you want. We're washing our hands of it.

Which, of course, I like.

On the one hand, you are getting very little direction, which can be iffy. But on the other hand, whatever you do they can't really complain. As long as it is conceptual.

The story is on recently divorced (or separated) guys who have chosen to live on their boats in Baltimore. So I call three of them and schedule to shoot a portrait of each one.

A heads-up from the writer tells me which one will be in the story's lede, so he's the guy that will need to carry the visual weight.

I am gonna take you through the thought process a little on this one. As I said earlier in the "Taming Harsh Sunlight" entry, I like to stack the deck in my favor whenever I can. So I schedule my lede guy to be shot 30 minutes before sunset. If the light is good, I can use the golden light on him. If it is bad, I can use my small strobes easily because the ambient light level will be low.

(Either way, I can strobe him after sunset for a different look.)

Taking a little poetic license on this (hey, they wanted conceptual) I am going to do it in dark, cool tones. These guys have all been through (or are going through) the period of depression that normally follows the breakup of a marriage, so it fits.

The photo at top is done with one Nikon SB-28 strobe, on a stand, with a cardboard snoot to control the beam of the light. The cool blue color is generated by setting the camera's white balance on tungsten, and putting a full + 1/2 CTO gel on my flash to balance—and then further warm—the light that hits the guy.

Click on the photo up top to see it much bigger, and you will see how crisp the light is when you (a) hard-light from the side, and, (b) have built-in color contrast between your strobe and your ambient.

EDIT: Looking at the big version, it is very splotchy on the continuous tones. This is because I jpegged the heck out of it to save blog storage space on a big version. They do set a limit, and I try to keep the pix as thrifty as possible to allow more stuff to be posted. Sorry 'bout that, and I hope you get the idea anyway.


Here is basically the same photo, without the tungsten/gel scheme:

The exposure (and process to get to it without a flash meter) is my normal deal. Start with a reasonable guess on the power of the flash. (I chose manual, 1/4 power.)

Forget about the ambient exposure for a sec. Using the TFT screen as a guide, I dialed my aperture down until he looked good. This happened to be at f/6.3, which is one of those weird, "between-stops" settings. Whatever.

Now that I have a working aperture, I move the shutter speed around until I get a nice, saturated blue that is fairly close to what I think the newspaper can hold in the reproduction process. The shutter wound up being 1/200th of a second.

We had a storm coming in, so we had to work quickly. This process all happened in about ten minutes.

Squeezing a few more minutes in before the storm, I took advantage of his going in to answer the phone. I told him to stay inside, and took my light stand in there with him. I removed the snoot (but left the CTO gels on) and put a tupperware bowl on the flash head, throwing light in all directions like a bare light bulb.

Same process on the exposure. I forget where it ended up, but you know the drill. This gave the designer a second choice if she didn't like my concept for the lede.

The second guy was shot in boring daylight, all available light. Oh, well. We already had a lede. The third guy was in the same marina as the first, and I didn't really have anything that would give a sense of place, so I was going to shoot him wide.

Turns out, he did not really want to be shot. So I had to scramble for the sense-of-place shot. But it is OK, 'cause we are being conceptual...

I drug out a trick I had been saving up that has nothing to do with light, but I wanted to pass it along anyway.

My wife has what I would call a Ph.D (push here, dummy) digital camera, but it came with some really cool panorama software. It can stitch together several frames to make an ultrawide photo. Turns out, it works on my big D2h files, too.

This is a fine ethical line, IMO. You can do stuff like this (in a features environment at least) but you have an obligation to explain exactly what you did to the readers. Which is what we did.

Here is the panorama-camera-on-the-cheap scene-setter. Click to enlarge it. I like the ability, and will drag it out in the future for other assignments. Always with precise explanation, tho.


Next: Dealing with TV's and CRTs


__________

New to Strobist? Start here | Or jump right to Lighting 101
Got a question? Hit me on Twitter: @Strobist
Have a passport? Join me in Hanoi: X-Peditions Location Workshops


Permalink

Found: Strobist's Counterpart!

OK, all of you wedding guys who have been e-mailing me with a bazillion questions:

Here is your site - Planet Neil.

He is all about learning how to better use on-camera flash. So, between the two of us, we gotcha covered, dude.

This site is built around wedding photography techniques. But the info is applicable to anyone wanting to better understand what you can do with your expensive little TTL Wonder Strobes without unhooking them from their mamas.

And besides, all of you wedding shooters can ask HIM about stuff now. :) Because I do not know Jack about shooting weddings, anyway.

Please go flood his site with traffic (and him with e-mails) and tell him he should link to Strobist. We're kind of a Yin-Yang thing, anyway. A link to his site will be archived in the links page, too.

Now, if someone would just make a site for that exact moment when you are removing the flash from the camera...

(Thanks to "Drime" for the tip. Keep 'em coming.)


__________

New to Strobist? Start here | Or jump right to Lighting 101
Got a question? Hit me on Twitter: @Strobist
Have a passport? Join me in Hanoi: X-Peditions Location Workshops


Permalink

Off Topic: Heads-Up on a Great AmEx Deal


Hey guys,

A quick, out-of-subject note from me (David). It is from way out in left field. But it is a good enough deal that I decided to post it.

Unsponsored endorsement: the Delta SkyMiles® AmEx Gold card has been my main travel/business card for the past six years, and I have been quite happy with it. Here's why:


The Upside

First, you get the standard gold-level suite of protections, rental car insurance, etc.

Second, you get a Delta frequent flyer mile for every dollar you spend, and two miles for each dollar you spend with Delta.

Third, those miles add up—and are surprisingly easy and flexible to use. (That has been the best surprise of all.) On its website, Delta prices all of its flights in dollars or miles. And I regularly find domestic flights in the ~25,000 mile range for round trips.

Fourth, the card gives you free bag check privileges on Delta flights, which is especially nice when you buy the super-saver, sub-economy fares that wouldn't otherwise include free bags. This card + sub-economy fares is my favorite hack. Plus, because of the card you board earlier when there is still overhead space available.

Fifth, when you fly Delta, even on the super-cheap fare classes, your Gold Card allows you to do a SkyLounge buy-in for $29. Trust me, if you have a long layover that price is totally worth it for the peace and quiet, included food and open bar.

Finally, they offer some other stuff, like the ability to purchase tickets in advance of the general public for big shows, etc. But that's not really a draw for me.


The Downside

The Gold Card version costs $95/year.

__________


I'm generally pretty skeptical about these arrangements. But having used it for six years it has worked out much better than I thought it would, which is why I have kept renewing.

I actually came in on a deal like this, and found the bonus miles to actually be worth well more than the annual fee. And then it went well enough on an ongoing basis so that I have stuck around.

So when I saw their latest refer-a-friend deal, I thought it was good enough to pass along even though this is something I normally don't talk about.


Here's the Deal

• If you sign up—and if you spend $2,000 within the first three months—you get a bonus of 60,000 Delta frequent flyer miles.

• If you make a Delta tix purchase within the first three months, you also get a $50 statement credit.

• Hypothetical: if you happened to be planning to buy Delta tickets within the next three months, that'd be a pretty good triple bonus: 60k miles (if you spent a total of $2k, all-in, in the first three months, plus you'd get 2 more miles per Delta dollar spent, plus the $50 statement credit.


Just the 60k bonus frequent flyer miles is enough for a roundtrip or two to many US domestic destinations. You can check the prices in miles on any Delta trip on their site.

__________


All-in, that is a great bonus package for a $95 annual fee card. Which, BTW, you do not have to renew. (I wasn't planning on renewing. Then I realized that for me it was a great deal.

Disclosure: If you do sign up and meet the minimum spend, I will also get a miles bonus (15k miles). The most I can possibly earn is 55k miles. Which is to say, less than any single one of you would earn.

But I am passing it along because a) I use and very much like the benefits of the card, and b) it's a good deal for those of you who sign up if you plan to hit the $2k level within three months. And if I do max out at 55k FF miles, Susan and I will likely use them to go out and visit our daughter in California.

This is only good through July. And they have specific rules about how I can do this. So if you are interested, hit me up via Twitter, here, and I'll DM you the coded link there, as they require me to.


That's it! Thanks for reading.

-David


__________

New to Strobist? Start here | Or jump right to Lighting 101
Got a question? Hit me on Twitter: @Strobist
Have a passport? Join me in Hanoi: X-Peditions Location Workshops


Permalink

New Source for 5-Section Mini Light Stand Found

Several people saw and noted yesterday (thanks) that Amazon's photo affiliate had stopped carrying the Bogen 6' Retractable 5-Section Light Stand, which is the Best Little Stand in the World, IMHO.

The above link points now you to a new source, Midwest Photo Exchange, who has them.


__________

New to Strobist? Start here | Or jump right to Lighting 101
Got a question? Hit me on Twitter: @Strobist
Have a passport? Join me in Hanoi: X-Peditions Location Workshops


Permalink

On Assignment: Add Light to Reveal Detail

Yeah, I know it's just a rock.

This is a quick little On Assignment example that I am going to throw in because it illustrates a good reason to throw that little light stand over your shoulder whenever you grab your gear out of your trunk.

One of our enterprising reporters at The Sun was doing a little research and found out that, due to a surveying error about 250 years ago, the county line between Baltimore County and neighbor Carroll County (in Maryland) was not where it should be. It was off by about 100 yards.

As a result, some people who thought they lived in Baltimore County really lived in Carroll County.

Big deal? Well, yeah, if you are the tax collector. Or if your kid is gonna get yanked out of school to be transferred to another county.

So, I go out with the modern surveyors (who know exactly where they are, to the inch, using fancy GPS interpolating surveying equipment) to shoot the evidence: a 250-year-old misplaced rock.

Well, much like with David Lee Roth, the ravages of time have not been kind to said rock, and the colonial surveyor's marks were weathered and very difficult to see. Especially in the overcast light of the deep woods.

The photo at left is shot using ambient light, which would not reveal any rock detail that would possibly survive The Sun's photo torture reproduction process. (The carving is on the other side of the rock, but it was very difficult to see in soft light.)

So to visually prove the point of the story I quickly set a Nikon SB-28 on a stand at a very hard angle to the rock. I moved it around until my TFT screen showed me that the detail if the early surveyor's mark (an "N 6") was very pronounced. (See photo at top.)

This is something you simply cannot do with any type of on-camera flash. Much like the paper detail shots we did in Lighting 101, the hard angle light is what brings out detail and hidden texture.

As a bonus, the strobe really made the colors pop and brought out the texture of the surrounding plants.

The rock close-up photo ran as the lead. Which either said they liked the result, or they thought the rest of my shoot was crap. (I didn't ask...)

If you have been visiting Strobist awhile, you can probably guess my metering technique, which can charitably be described as "Kentucky Windage and Elevation."

Once I got the flash (which was nuking the rock on about 1/4 power from three feet away) at the right angle, the rest was simple.

I adjusted the aperture until the flash-lit highlights looked good, which gave me a working aperture of about f/16. (I cannot remember exactly.) Then, I simply started opening up the shutter speed until the shadows were where I wanted them.

The idea was to get them dark enough to keep the detail in the rock carving, but light enough to have a little detail in the surrounding leaf shadows.

You already have your flash with you when on an outdoor assignment. Just having Pocket Wizards (or a synch cord) in the waistpack and a light stand slung over your shoulder gives you the ability to up the quality level on a simple photo like this.


Next: Guy on a Boat


__________

New to Strobist? Start here | Or jump right to Lighting 101
Got a question? Hit me on Twitter: @Strobist
Have a passport? Join me in Hanoi: X-Peditions Location Workshops


Permalink

Comments, Tips and Questions

If you have a general lighting question, please ask it in the Strobist Flickr discussion group. You will find your answers—and a lot of nice people who are all into off-camera lighting—there. Plus, your question and answer will be public, and thus will be available to help others.

If you need to ask me something specifically, please do so via Twitter. Twitter's focus on brevity (280 character limit) means I can commit to answering pretty much any question that isn't an easy Google. Plus, if your question is something that I think will be of benefit to others, I can make both the question and answer public. Which is way better than my answering 20 similar versions of the same question in private.

If you are pitching a podcast or written interview, please include listenership/readership info in your query. That (and whether it is an appropriate subject area) play a large part in deciding whether it is worth deferring time from work to participate in your project.

Finally, yes, it is easy to seek out my email addy with the various whois tools. But please don't cold email me. I don't list an email contact on the site, and we both know you saw this before you emailed me. So please don't.

Being available via Twitter is my balance between wanting to be both helpful and responsive and not spending all day responding to one-to-one lighting questions via email. Which is what was happening before. I'm a one-man band, and family is important. Please help me maintain that balance.


Thanks much,
David


__________

New to Strobist? Start here | Or jump right to Lighting 101
Got a question? Hit me on Twitter: @Strobist
Have a passport? Join me in Hanoi: X-Peditions Location Workshops


Permalink

On Assignment: Designing a Backdrop

The Baltimore Sun's Christopher T. Assaf leads a bit of a double life, working both as a photojournalist for the paper and an art photographer during his free time.

His ethic as an art photographer frequently shows up in his newspaper work. He is known for producing photos which combine elegant composition with nuanced light.

This photograph of a local prep track star for The Sun's Varsity section is a good example.

He showed up to photograph the long jumper at practice only to find out that she was nursing an hamstring injury and would not be practicing that day. So he pulled out his shoe-mount flash and light stand and produced a series of portraits, one of which was used on the cover and another for an inside lead.

The photo above combines strong, 45-degree light with a carefully chosen background. The ambient is coming from the opposite direction, as seen by the shoulder highlight and fence pattern on the leg at camera left.

Chris used a Nikon SB-800 flash (at 1/2 power on the 105mm zoom setting) on a small light stand to light against the ambient sunlight at 1/250th at f/16. The light was aimed at the upper half of her body to allow it to fall off towards the bottom of the frame.

What brings the composition together was choosing the shooting position to use the hill as a background behind the fence. This could also have been done without the light, of course. But adding strong, directional light gives the photo two different planes - front and rear - which can be controlled separately by altering the aperture and/or shutter speed.

Chris stood on a stool to get the height needed to line her up with the better background.

Using light gave him the ability to quickly create three strong portraits (this one, and two others) in a short time. The one shown here was his favorite of the three he turned in, but did not run.

Chris said that he made a mental note to consider only giving them his strongest cover prospect next time.

I think he's on to something there.


Next: Lighting for Detail


__________

New to Strobist? Start here | Or jump right to Lighting 101
Got a question? Hit me on Twitter: @Strobist
Have a passport? Join me in Hanoi: X-Peditions Location Workshops


Permalink

New Links Added: Some Great Shooters' Sites

I noticed a lot of traffic coming my way from Sports Shooter yesterday, and stopped by to check out why. Turns out someone had included Strobist in a collection of favorite photo links. (Thanks, Paul!)

I cruised through many of the other links that had been suggested by others there and put some of the best photog's sites up on the links page. Some of these are stunning examples of both quality of work and how to showcase it.

Warning: DO NOT visit the link page now if it is getting near your bedtime. You could have a couple hours of compulsive clicking waiting for you. But if your S.O. is already asleep, what the heck. You can rest later.

The link is at the right, on the sidebar. Or just click here to head straight there. (Hit "refresh" if the new stuff does not come up for you.)

Enjoy.


__________

New to Strobist? Start here | Or jump right to Lighting 101
Got a question? Hit me on Twitter: @Strobist
Have a passport? Join me in Hanoi: X-Peditions Location Workshops


Permalink

The DIY Flash Synch Cord Tutorial is Up.

Finally got around to buying the stuff to make a zip-cord PC synch cord just to show how to do it. It is really easy, and should hold you until you hit the lottery and can buy Pocket Wizards.

It is in two parts, and sequenced in the Lighting 101 section, so click here to go there in a new window.


__________

New to Strobist? Start here | Or jump right to Lighting 101
Got a question? Hit me on Twitter: @Strobist
Have a passport? Join me in Hanoi: X-Peditions Location Workshops


Permalink

A Note to Strobist Readers

I launched Strobist on April 5th with what I thought would be a "soft start." And I have been absolutely overwhelmed by the feedback I have gotten from you guys so far.

I have been so busy cranking out pages for the site - it's up to 53 articles and growing - that I haven't had time to send out a blanket "thank you" for all of the very kind e-mails, comments and suggestions you have sent thus far. I feel like we are all at the start of something that could grow into a pretty cool journey.

I keep a very busy schedule shooting (not to mention being a dad) but I have no intention of slowing this thing down any time soon. There is a lot more stuff to come, and I look forward to implementing many of your suggestions into the information flow.

Doing this has also re-energized my approach to location lighting. That is the best by-product of teaching. And for that, I thank you.

I have long suspected that a structured course in off-camera flash use was a big hole in most young photographers' education. It is very gratifying to know that many of you think Strobist is starting to fill that void.

That said, I have a small favor to ask of you. If you enjoy and value the site, please start to spread the word. I have no - as in zero - marketing budget. Strobist is strictly a word-of-mouth thing. And my goal is to reach as many young shooters as possible with a free and informative site. The more, the merrier.

So if you could pass the word along to your colleagues/fellow students or on your photo message boards/list serves, I would be very grateful. And feel free to post a comment detailing how you did it, if you like. (I'd love to know.)

Thanks again. And keep those comments coming.

Sincerely,
David


__________

New to Strobist? Start here | Or jump right to Lighting 101
Got a question? Hit me on Twitter: @Strobist
Have a passport? Join me in Hanoi: X-Peditions Location Workshops


Permalink

On Assignment: Thinking Outside the Box

Sometimes there seems to be no place to stick your light where it won't create more problems than it will solve.

A good example is this martial arts-themed exercise class at a senior center.

It was a typical dance rehearsal style room, with one of the long walls covered in mirrors. Sure, you can do cool things with the reflections, but you have to hide yourself while you do it. You can either work at an oblique angle to the mirror, or hide behind an object or person in the frame.

But including a light in the equation adds another variable/limitation/problem/opportunity, depending on how you look at it.

Now you need to find an angle where there is good composition, you are hidden, your light is hidden and the light is doing worthwhile things to your subject.

This is easier than it sounds. The solution is to light the scene from outside of the room.

In this room, assuming you are standing at center, the wall of mirrors is the long wall in front of you. At the upper right corner of the room there is a door. There are also a couple of windows along the wall to your right.

I stuck the flash about 8 feet outside of the door and aimed it back into the room to hit the instructor and spill over onto the front row of people. The open door and one window created two broad shafts of light.

The light is coming from slightly in front of the instructor and I am behind him. This is not a problem because I can shoot his reflection in the mirror. Problem solved.

The mirror also gives me access to the cool shadows being created along the back and left side walls of the classroom, too.

My light will affect the whole room without popping up in a shot (either directly or as a reflection.)

The light was set to a 70mm zoom angle, and on 1/2 power. I wanted some depth of field and enough light to create some dark shadows by cranking up my shutter speed if I wanted.

When using hard, direct strobe in a room you will get shadows that you do not see unless you either chimp your TFT screen or carefully scan for them as you test pop your flash. I do one or the other regularly as I work.

These can work for you, as is the case in the close-up (above) of the lady working with the wooden sword. Keep an eye out for those opportunities.

Or they can work against you, as in this photo just below.

Can you see my problem yet? Look on the lower right. I may be hidden, but the tell-tale shadow of a camera with a Pocket Wizard attached to the hot shoe is clearly visible.

Just be aware of both possibilities.


Next: Lighting for Detail


__________

New to Strobist? Start here | Or jump right to Lighting 101
Got a question? Hit me on Twitter: @Strobist
Have a passport? Join me in Hanoi: X-Peditions Location Workshops


Permalink

On Assignment: Light the Little Stuff

The other morning I had an assignment to photograph 8-year-old Peter Schultz, who won the "best handwriting" contest (second grade division) for the state of Maryland.

The kid is a living font. And he is left-handed, no less. Which doesn't make things any easier, I'm told.

The story, slated to run in one of the zoned editions of The Sun, is a good example of the kind of assignment we all get most every day. Nothing earth shattering. Just go shoot a photo of someone who did something special.

This is a no-glamour, no-adrenaline, no-pressure type of assignment. And it is exactly the type of assignment you should be lighting.

Hey, they can't all be assignments to shoot mothers tossing babies out of burning buildings into the arms of firefighters, right? Those kinds of assignments shoot themselves. They will always produce good photos. They'd better, anyway.

But the daily stuff - boring stuff, some would say - is where you show your professionalism. It is not about how hot of a photo you can occasionally get. It is about where your daily minimum quality level is.

This is the kind of assignment you want to light - for a number of reasons.

First, you'll up the quality level. Good lighting does that.

Second, there's absolutely no pressure at all. That is a good place to practice without fear of failure.

Third, no one is pressing you on time. Heck, Peter the Human Typewriter is getting out of math class for this. He'd be happy if you soaked up an hour or two of his morning.

So I am sticking this up as an example in a couple of areas. We already mentioned the low-pressure assignment as a good practice time. But I also wanted you to see the versatility that sticking one little flash in an umbrella can give you.

So, the light is exactly as you see it in the first photo, at top. After setting it up, I did not move it at all during the assignment.

Lotta work, huh? Maybe a minute. For those keeping score, the flash was on 1/4 power manual. The camera was at 1/250 @ f/5.6 at ASA 400. Florescent balance, with a green gel on the flash.

So, the kid starts writing what he had to write in the contest just to show me his stuff. To say this kid is deliberate would not do him justice. He is not gonna win any races. He is all about quality. And if a letter bothers him - at all - he will erase it and do it over.

This sentence is clearly going to take 15 minutes. So I have time to do whatever I want.

I start out with a close up shot of him writing, shown here. My preference is to kind of keep a running conversation with someone as I am shooting. (Yeah, I'm a gabber. Sue me.) So I point out how he reminds me of Michael Jordan with the tongue-sticking-out-thing.

He thinks that is cool.

While I am talking, I zoom out a little and include the windows. All same shooting and light position, same exposure.

The light is at about a 90-degree angle to the kid, so it is defining him well against the darkened back wall. Next, I walk around to the far side of him and get a detail shot.

The light gives me enough aperture to keep his hand and his excruciatingly perfect letters in focus. It looks much more crisp than without the light, I would think.

After he finishes up his sentence, I turn him to where the light is now hitting him on a 45-degree angle and shoot him with his handiwork.

Then, on a whim, I shoot a couple of frames with his face mostly obscured by the paper. In the end, I liked this shot best. And again, the light gave me the depth of field to hold focus on both planes.

No, it's not a killer story or assignment. But the page designer has five crisp photos that will reproduce well and hold at any size. This gives them the option to run it small, large, or even to do a two- or three-picture package.

Sure, he is most likely page three fodder. But if they need him out on the zone front, he'll hold because of the technical quality of the photos, if nothing else.

Look, they can't all be Pulitzer winners. But you can use these assignments to raise the bar on you minimum quality levels while you practice your lighting for the more important assignments that are yet to come.

And doing well on the daily grind is how you get the better assignments anyway.


Next: Thinking Outside of The Box


__________

New to Strobist? Start here | Or jump right to Lighting 101
Got a question? Hit me on Twitter: @Strobist
Have a passport? Join me in Hanoi: X-Peditions Location Workshops


Permalink

Link Page Expanded

Just added quite a few new sites on the Page-a-Links. Added more blogs, more PJ sites and the beginnings of list of college PJ programs. I am collecting URLs of other professional and student photojournalist's blogs, too. Those are coming soon.


__________

New to Strobist? Start here | Or jump right to Lighting 101
Got a question? Hit me on Twitter: @Strobist
Have a passport? Join me in Hanoi: X-Peditions Location Workshops


Permalink

On Assignment: Big Gym, Little Lights

Building a little on the basketball lighting technique we talked about earlier (open "Lighting Prep Basketball" in a new window) I wanted to explore another example of using one small light to illuminate a large, long-throw area - and adding a second to improve it.

All of the heavy lifting in the top photo is being done with one Nikon SB-28. It is on full power, and placed in the top center of the bleachers at half court on camera left.

The flash zoom setting is on 85mm. This not only gives me increased efficiency, but also serves to help to "feather" the light on the left side of the photo.

What is feathering? The left area of the photo is closer to the flash and should have been brighter. But the area was also starting to fall outside of the "beam spread" of the light, which was aimed at the basket. This helped me to balance the exposure across the background very easily.

Getting back to the light setup, we have one strobe lighting the whole scene. That's asking a lot for a small strobe at this distance - even at full power. And the ASA still had to be pushed to 800. But the quality of the light will fool you and make you think it was shot at a lower ASA. (In my opinion at least.)

The look is helped by two little tricks which finesse the light a bit.

First, the dunker's shadow is far enough to the right to be out of the frame. This disguises the fact that it is being lit by one hard, long-throw light. He's pretty close to the back wall, so his shadow would have been distracting.

Second, and more important, there is another strobe on a stand at camera right (just outside of the frame, close to the subject) set to 1/32 power. This strobe is cross lighting him, which erases much of the tell-tale "hard light shadow side" of the dunker. At the same time it gives him a nice highlight on the right side, creating a more three-dimensional shape.

This is basically one-half of the basketball lighting technique posted earlier, with the second strobe now being used as a low-power, cross-light kicker instead of second light at 45 degrees from the other side's bleachers.

The dunk photo was the inside lead for The Sun's "Varsity" section, which highlights standout prep athletes from different suburbs around Baltimore. (The photographers love this new section because it gives us guaranteed good play and a chance to play.) The second, vertical photo was used as the cover. Both were shot in a total of about 15 minutes.

Now, before I explain the light on the cover photo, try to reverse engineer it. I will tell you that the bleacher light (lighting what is now the background) is unchanged. And, by now you should know I am pretty lazy when it comes to setting (and re-setting) a bunch of gear.

The cover shot was an easy switch, lighting-wise. I just walked the 1/32 power light stand on the right and stuck it close to mid court on the left. I had to bump it up two stops, to 1/8 power, to light the basketball player as he dribbled. The light stand was set to camera left and in front of the player. So, both the background light and the main light (for the player) are now coming from camera left.

I was so grateful to the people who had painted the whole gym wall "Scorpion Orange" that I got down on my belly to give thanks.

This, if course, made the polished wood floor reflect the wall. Which made the player almost seem to float on a background of orange. You'll need to put the camera directly on the floor to maximize this effect.

Two small lights. One big area. Two setups. Fifteen minutes.

Easy as pie.

When you get used to doing this small-flash lighting thing, you will be amazed at (a) how quickly an lighting idea will come together, and (b) how fast you can set up and execute it.


Next: Light the Little Stuff


__________

New to Strobist? Start here | Or jump right to Lighting 101
Got a question? Hit me on Twitter: @Strobist
Have a passport? Join me in Hanoi: X-Peditions Location Workshops


Permalink

On Assignment: Taming Harsh Sunlight

Whenever I am setting up an assignment to go photograph someone, I like to give myself as many advantages as possible.

I am always aware of when sunset (and, less enthusiastically, sunrise) will occur, and plan shoots around that time if there is some flexibility.

Sadly, we can't always plan our shoots to start a few minutes before "golden light" and finish up shooting strobe into a sunset. Ah, would that it were always thus.

But getting back to reality, take Morris Martick, above, who is an 83-year-old chef/owner of a funky, bohemian little French restaurant in a, uh, "not very trendy" part of Baltimore.

There is no handle on the door, and it stays locked. You ring the bell and Morris lets you in. When you take a cab to this place at night, the driver will usually look at you and ask, "are you sure this is the place?"

Anyway, we had shot a restaurant review but had nothing good of Martick, so I went back to make a quick portrait that could run with the review.

I knew I was going to shoot him out by his funky, hand-painted, South-of-France-looking sign, so I asked when he would be free.

Eleven o'clock a.m.? Great. 'Bye.

(yuck.)

So, there's not a cloud in the sky and the light is just as harsh (and from just as bad of an angle) as you would expect. Coming in high at ~45 degrees from camera right (see inset photo.)

When working fast in a situation like this, I sometimes like to co-opt the sun as my second light in a 2-light, 45-degree setup. Can't cross light him because there is no room behind him. Doesn't matter if the sun cannot get up under the guy's brow. Just make sure your flash is able to get up under there and light his eyes.

The setup for this could not be simpler, and yields a "1960's" kind of two-hard-light look.

I set the shutter to the highest synch speed, which for a Nikon D2h is 1/250th. Zero out the ambient exposure with the aperture. Flash goes up on a stand at camera left (45 degrees) at ~1/4 power, zoomed to 85mm for maximum efficiency. (Make sure the flash is high enough to look good on him, but not too high to get up under his brow.)

At 1/4 power, the strobe (about 5 feet away) was too hot. So it was just a matter of opening up the shutter speed and closing down the aperture until I got a ratio that I liked. That way the ambient exposure remains the same and the flash exposure lessens becaused of the increasing aperture.

If the strobe had been too weak, I would have cranked the power to bring it up some. Quick and easy either way. And no flash meter is needed, thanks to the TFT screen on the back of the digital camera. (Hey, if you want to buy a flash meter anyway, be my guest. I have one I'll sell you.)

As you can see from the third photo, I use my hand to quickly nail down my light, usually before the subject is even there. Quick, accurate and easy. Only downside is the fact that you can get some strange looks from people on the city streets if you are walking around photographing your own hand.

You get a crispness and three-dimensionality from this quickie setup that you just cannot get using on-camera fill. And it takes maybe a minute to set up.

The important thing to remember is that doing something like this should quickly grow to be a default setting for you as a photographer. This should be a bare minimum strobe technique, the way many people now view on-camera fill flash.

If you are doing stuff like this by rote for quickie, everyday assignments, when you decide to stretch you will have a comfort level that allows you to push your light and do something really cool.

On-camera fill flash should be an absolute last resort, used only when nothing else is practical.


Next: Big Gym, Little Lights


__________

New to Strobist? Start here | Or jump right to Lighting 101
Got a question? Hit me on Twitter: @Strobist
Have a passport? Join me in Hanoi: X-Peditions Location Workshops


Permalink

I know you're out there...

... unless it is my mom who is clicking on the site nearly 5,000 times a day.

So, like, ya know, if you guys would start to use the comment section and stuff, we could, like, well, you know, actually benefit from having an ongoing discussion about some of this lighting stuff, too. Howzabout a little diversity of thought around here?

Or you could just continue to sit back and just read everything I post as if it were The Gospel or something. Which is a really scary thought.

In fact, if there is a subject in particular that you would like to see explored (lighting wise) or something Strobist is already doing that you would like to see more of, just wail away on the comment link right below this post.

Muchas gracias, y'all.


__________

New to Strobist? Start here | Or jump right to Lighting 101
Got a question? Hit me on Twitter: @Strobist
Have a passport? Join me in Hanoi: X-Peditions Location Workshops


Permalink

Lighting 101: Build a Pro PC Cord, Pt. 2

Repeating the important note from part one: There are those who believe that using household-style sync cords poses an inherent risk in that they could be mistakenly plugged into an AC outlet. That said, building a sync cord based on HH plugs is inexpensive, reliable and convenient. Which is why many pro's use them as primary (or backup) synching systems.

The cord I have designed uses two very short, male-PC-to-male-household, store-bought cords and a main cord composed of a FEMALE HOUSEHOLD TO FEMALE HOUSEHOLD main body. As such, the extension cord itself is quite impossible to plug into the wall.

In twenty-plus years as a pro, I have never met a photographer who was involved in the kind of an accident as described above. But if this is the kind of thing that just keeps you awake at night, simply gaffer tape up the plugs where they join. If you are worried that someone is going to dive for your PC cord, untape it, rip it apart and plug the little 6" part into the wall, I can't help you. Buy some Pocket Wizards.

Alternatively, you may wish to substitute a 1/4 mono plug or 1/8 mono-mini plug in place of the respective HH plugs. But you'll peobably have to do some soldering.

This is also an alternative if US-style HH plugs are not available in your country.


_________________


First of all, here are the sources for the parts.

(2) Short, PC Male-to-Household cord (where to get it): Varies - as little as $10 for a short one
(2) Female plug adapters from Home Depot: $2.98 each, or $5.96
(2) Ball-bungees (Home Depot, WalMart, etc:) Less that $1.00
16 gauge zip cord at $0.24 a foot at Home Depot: $4.80 for 20 feet

The process for each end is the same, so you will do this twice. You'll need a knife, scissors, a screwdriver and a pair of pliers (or your teeth.) Very easy stuff, even for the not-so-handy types.

Using scissors, cut about one inch down the notch between the two parts of the wire, as shown.

Make sure you stay inside the notch on your cut.

Using a sharp knife at about 1/2 inch from the end, cut through the rubber insulation to the metal wire. Do not cut the wire. If in doubt about where you are, stop, bend the wire and check. Flip the wire over and do the same thing.


Next, grasp the insulation on the tips of each of the two wires, twist it and pull it off. You may wish to grasp it with pliers. I used my teeth. Please do not tell my wife. Now, twist the wires (individually) to make the easier to bend and connect later. Your wire ends will now look like this, with two stripped wires.

Bend the little stripped ends into a "U," as shown. Repeat the same process for the other end of the wire. (This is the extent of the cutting/stripping/pliers grasping part.)

Get your female plug end and open it up with a screwdriver. This plug shown is the one from Home Depot. (If yours is different, figure it out. Should be really easy.)

Your wire should have labeling of some kind that runs along one of the two sides. Almost all wire does now. If not, grasp one end of the wire and make a mark on one half of it. Now pull it through your hands and get to the other end so you can make a similar mark on the same half of the wire.

(You wire will almost certainly have markings already on it, if you look closely.)

Next, take your little bent wires and connect them as shown. The plug ends will be "polarized," which means one slot will be a little longer than the other. This is why we are keeping track of which wire is which. You'll want to connect the same wire half to the long slot at each end of the wire, and vice versa. It is easy, and it will help to protect your camera.

Now, prepare to close the plug. Make sure the wire will not be pierced by the screw, as shown. Close it up. The plug should clamp the wire firmly. If not, open it back up and wrap a little black electrical tape around it. But most plugs clamp automatically.

Repeat the process at the other end, and your work is pretty much done. I hope this was as easy for you as it seemed to me. If you just follow the steps carefully, you should be fine. I tested it on my five-year-old, and he assembled a half just fine. :) (And yes, I tested it it well. The point is, you can do this even if you do not normally do handi-man stuff.)

Now, just plug the PC cords into each end and attach whatever you are using for strain relief.

There you are.

Here is an example of how I hang it on my flash when I am using it. I usually stick the other ball bungee around my lens at the other end of the cord. The important thing is not to have that PC connection carrying the weight and/or wiggling around.


Next: Soft Light: Umbrellas


__________

New to Strobist? Start here | Or jump right to Lighting 101
Got a question? Hit me on Twitter: @Strobist
Have a passport? Join me in Hanoi: X-Peditions Location Workshops


Permalink

Lighting 101: Build a Pro Synch Cord, Pt. 1

Important note: There are those who believe that using household-style sync cords poses an inherent risk in that they could be mistakenly plugged into an AC outlet. That said, building a sync cord based on HH plugs is inexpensive, reliable and convenient. Which is why many pro's use them as primary (or backup) synching systems.

The cord I have designed uses two very short, male-PC-to-male-household, store-bought cords and a main cord composed of a FEMALE HOUSEHOLD TO FEMALE HOUSEHOLD main body. As such, the extension cord itself is quite impossible to plug into the wall.

In twenty-plus years as a pro, I have never met a photographer who was involved in the kind of an accident as described above. But if this is the kind of thing that just keeps you awake at night, simply gaffer tape up the plugs where they join. If you are worried that someone is going to dive for your PC cord, untape it, rip it apart and plug the little 6" part into the wall, I can't help you. Buy some Pocket Wizards.

Alternatively, you may wish to substitute a 1/4 mono plug or 1/8 mono-mini plug in place of the respective HH plugs. But you'll peobably have to do some soldering.

This is also an alternative if US-style HH plugs are not available in your country.


_________________

In retrospect, I was pretty hard on synch cords. I made the jump to wireless about ten years ago. The Pocket Wizards have been a Godsend.

But I also remember what it was like to try to cobble together a lighting bag on almost no budget. Wireless remotes to not fit into that bill at all. And the very last thing I want to do is to have those mui-expensivo Pocket Wizards scare someone out of learning how to light off camera. So here goes.

The last synch cord I was using before I went wireless is the synch cord I am going to show you how to make. It is designed to be cheaper, more durable and more reliable than the one-piece, store-bought cords. And it can be made very long - I have used 75-foot versions with good results - for very little extra money.

It is made with two Household-to-PC cords, one at each end. The middle is basically an extension cord with "female" fittings at each end.

(If you do not know what the "female" part means, I am not going to be the one to tell you. Think about it.)

At each end is a short household male-to-PC cord (where to get it.) This will plug into your camera or one of those PC tips on the cheap Nikon SB-24's (or any other PC-equipped Nikon strobe.)

If you are going with another flash brand (with a different connector) I will leave it to you to figure out how you'll connect it. Please put your comments at the end of this post to share with others if you do. No secrets here.

You will also place a 6- or 8-inch ball bungee at each end, for strain relief. The tips on PC cords are vulnerable, and also the expensive part. You want the PC connection to stay still. You also want the cord to be supported by something, and not hanging by the PC connection at either end. This is how your cord will last a very long time.

The middle of the cord is 16-gauge "zip" cord, or lamp cord as some people call it. You can buy it in bulk. Why? It is durable as heck. Wiggle it all you want. No problem.

It is also easily replaced or repaired. Say you made a 20-foot synch cord and now you need a 35-foot one. You could just replace the cheapo lamp cord in the middle in about 5 minutes (if that) with a 35-foot section, for less that $7 at Home Depot (which is my favorite photo store, because I am a certified cheapskate!) The stuff is only 24 cents a foot. Schwing.

So, what you're going to make is basically a 20 foot extension cord with female fittings at each end. Then you'll plug the PC-to-household male 6" cords into each end, put on the ball-bungee strain relief, and, as they say in the cool Guy Ritchie movies, Bob's your uncle. (That mean's, "you're done.")

Why female at each end of the main cord? Because females are smarter than males. No, no, no. Because this will make it impossible for some "helpful" bystander to plug your synch cord into an AC outlet that way. (Which will do very interesting smelly, smoky things to your digital camera...)

Also, keeping the cord the same at both ends means that you can elect to get a third PC cord to keep as a backup, and it'll work at either end. And you can make it longer in a pinch by adding a normal extension cord.

So, let's run the numbers before we get into the how-to's.

(2) Short, PC Male to Household cord (where to get it): Varies - as little as $10 for a short one
(2) Female plug adapters from Home Depot: $2.98 each, or $5.96
(2) Ball-bungees (Home Depot, WalMart, etc:) Less that $1.00
16 gauge zip cord at $0.24 a foot at Home Depot: $4.80 for 20 feet

You are more than welcome to buy an all-in-one cord, but the long ones get expensive. The zip-cord way allows you durability, length-flexibility and cost savings over the long, one-piece models.

If your flash does not have a PC jack, you can add a "household" synch terminal to it by getting a Household to Hotshoe adapter (where to get it) which is a great idea, as it means you only need to get one small PC cord to connect the zip-cord-based PC cord to your camera. Everything else - even multiple flashes - can be done with cheap household connectors.

Whichever you choose, make sure to use the strain relief at the PC connections (bungee, rubber band, string, whatever.) That is the big secret to making a cord last for a long time.

Next: Building a Pro PC Cord, Pt. 2

Labels:


__________

New to Strobist? Start here | Or jump right to Lighting 101
Got a question? Hit me on Twitter: @Strobist
Have a passport? Join me in Hanoi: X-Peditions Location Workshops


Permalink

On Assignment: Prep Basketball

There are lots of ways to use strobe to improve high school sports. And typically, nothing needs improving more than dimly lit high school hoops.

The gyms are often black holes, with ambient levels as bad as 1/125 at f/2 at 1600 ASA. Not even a speed lens and a hard ASA push is gonna help much there.

On top of that, there are hot spots and cold spots. And the sadistic architects seem to like to keep it nice and dark right over the rim for some reason.

I have evolved from shooting (un)available light, to direct strobe (ugh) to nuking the ceilings with White Lightning Ultras (find an outliet and hope no one knocks over your strobes.) I have even shot at 250 at f/2.8 at ASA 1600 and bounced a Vivitar 283 (at full power manual) off of the high ceiling (!) which has gotten me out of some dark situations.

But what I have been doing for the last few years is to cross light with a pair of shoe-mount strobes stuck up in the bleachers.

Lighting half of a gym is a lot to ask from a pair of SB's. So I am not overpowering the ambient, so much as finessing it.

This is not a bare-bones lighting setup, as far as cost is concerned. I use two shoe-mount strobes on Bogen Superclamps, high voltage Lumedyne external battery packs (because I am shooting lots of frames at half power) and trigger them with Pocket Wizards. Synch cords would be completely impractical in this situation. The point is to show you what you can do with a pair of SB's.

Here is the technique.

I am lighting half of the court with the two strobes. I can light the other half with two more - very easily - for a full-gym lighting setup with four shoe-mount strobes. (I will get to the front-court half of the four-light setup in a subsequent OA article.) But I typically shoot opposite end hoops with prep basketball. Typically, you need coverage at both ends for college and pro, when you need the picture. Prep, you usually need a picture, so long as it reasonably fits the outcome of the game.

This is a good example of both the "cross light" and "long-throw hard light" techniques we talked about in Lighting 101. It works because we are not working too much above the ambient, which is now providing the fill.

The lights are going to be placed (with Superclamps) above the middle of the bleachers, one on each side. There is something to clamp to above the center of the bleachers about 95% of the time. Railing, metal pipe - something. Even conduit, in a pinch. If there is nothing there, you will have to improvise (and tell me how you did it.) And don't clamp too tightly on electrical conduit, by the way. Use common sense on any clamping support.

The flashes are going to be set on manual at about half power. If the lights are typical sodium vapors or florescent (it'll almost certainly be one of the two) set your camera on florescent and green your flashes. It'll get you pretty close in either case. And besides, the ambient is only acting as fill.

Set the flashes to the 50mm zoom setting. You want a balance of coverage angle and ability to throw the light. You may be able to get away with a 70mm flash zoom setting for more efficiency. But you will have to experiment.

Aim the lights to a point about ten feet in the air above the top of the key.
The strobes should give you a pretty honest f/2.8 at your highest synch speed at ASA 640. If they are hot, turn down your ASA. If dark, vice versa.


This will be at about 2-3 stops above the ambient, but you are working at (pretty close to) the right light color anyway. So no worries - it's all fill. The light will be crisp, but you will be able to read the shadows just fine.

The light will cover about half of the court. If you are following both teams, stay at one end for the whole game and shoot cross court with an 80-200 or a 300. If you want, you can shoot from the sideline about a third of the way up-court, too. If you are following one team, just go up and re-aim the lights from the same positions at half time.

With a little practice, setup is less than 10 mins and teardown less than 5 mins. If I have 10 minutes to shoot a game on early deadline, I will absolutely use the lights. Even though I will only get 5 mins of shooting time (and the other 5 mins as teardown time) I will have more quality choices to choose from with the lights vs shooting all 10 mins available or on-camera.

Experiment with your power settings and angles. Use the warmup time to shoot and test.

You will be very happy with the quality of the light compared to anyting you can do on-camera.


Next: Taming Harsh Sunlight


__________

New to Strobist? Start here | Or jump right to Lighting 101
Got a question? Hit me on Twitter: @Strobist
Have a passport? Join me in Hanoi: X-Peditions Location Workshops


Permalink

New Area: The Strobist Bookshelf

I have more "On Assignments" coming soon, but I wanted to complete the education and resources section first.

To that end, you'll notice that the sidebar now has a "bookshelf" link. It is a tight-but-good list, and there are additions coming. You will always be able to reach it there, or you can click here now. I will post notes whenever it is updated.

The bookshelf link will also be folded into the Lighting 101 linked series.


__________

New to Strobist? Start here | Or jump right to Lighting 101
Got a question? Hit me on Twitter: @Strobist
Have a passport? Join me in Hanoi: X-Peditions Location Workshops


Permalink

Lighting 101: Pre-Visualizing Your Light


The big problem with flash is that for many photographers it is a leap of faith. It happens so fast you can't really see it — or what it's doing. Continuous light is so much more comfortable, because we can observe it real-time.

One workaround for this is to use a big, heavy expensive flash with a "modeling" light built in. The modeling light mimics the much more powerful flash (same location as the attached flash) and shows you what the flash will illuminate, and how.

I am going to try to talk you out of that, to start. Why? Because flashes with modeling lights are bigger and more expensive. And either they have to plug into the wall or they need pretty heavy batteries.

And besides, with a little experimenting you'll find you don't need that crutch of a modeling light. Here's why.

You know what hard light looks like. Sunny day. You know what soft light looks like. Cloudy day. You already have a lot more intuition about light than you think. You just have to hone it a little, as we talked about in the last post about reverse-engineering others' lighting.

It's the same thing; we are just approaching it from the opposite direction. You are trying to visualize what your light will look like (i.e., what it will illuminate) before the fact, not after.

You'll want to know things like, a) where will the light fall, and b) will there be reflections?

Reflections are pretty easy. Light works like a pool shot. Light will reflect off of a subject at the same angle (but in opposite direction) that it struck.

That is why we learned to light eyeglass wearers at an oblique angle. The reflections are still there. They are just diverted to bounce harmlessly away from the camera viewing angle.

You can also pop the flash and "eyeball" the scene - especially shiny or glass areas - to check for reflections, too. Just make sure you are looking from the same position from which you will be shooting.

It is easier than you think. Try it.

Now, where will the light fall? What will be illuminated? That one is different, and is the main reason most people use modeling lights. And there is a really easy workaround to this question.

You are already used to walking around a looking at your scene from a few different points of view to choose your camera angle. (You should be, anyway.)

You need to get in the habit of doing this with your light, too. A good time to do it is while you are setting up your lights. Simply view the subject from the position of your light.

When you are looking at the scene from your light's position, you see exactly what the light will see. Makes sense, right? And with a little practice, this will eliminate your need for a modeling light.

It is a very fast procedure. Especially if you are folding the process into that of setting up the lights.

I know it may sound a little weird. But just try it.

Next: It's Not (All) About Flash


__________

New to Strobist? Start here | Or jump right to Lighting 101
Got a question? Hit me on Twitter: @Strobist
Have a passport? Join me in Hanoi: X-Peditions Location Workshops


Permalink

Humble Beginnings: Links Page

Strobist's Link page is now up. In it's beginning form, anyway.

Now that I have the template up, adding to it should be pretty quick and easy. There are more links I would like to post this morning, but I am still behind on moving some of last week's photos to the paper, so work-work comes before play-work.

The link on the sidebar at right will get you there whenever you want. Or you can click here right now.


__________

New to Strobist? Start here | Or jump right to Lighting 101
Got a question? Hit me on Twitter: @Strobist
Have a passport? Join me in Hanoi: X-Peditions Location Workshops


Permalink

Strobist Index Update

The Strobist Index has been greatly expanded and has moved. It is now here.


__________

New to Strobist? Start here | Or jump right to Lighting 101
Got a question? Hit me on Twitter: @Strobist
Have a passport? Join me in Hanoi: X-Peditions Location Workshops


Permalink

See the Flash

As we said earlier, the incredibly brief burst of light from a strobe can be very difficult to visualize. Sure, you can see it. But what I mean is that it is hard to understand the way it is going to look when you are first learning to light.

At least it was for me.

I had this instructor in the photojournalism program at the University of Florida, (former Miami Herald photographer John Walther) who would tell me to just pop the flash and look at the effect on the subject/wall/whatever.

I can still hear him.

"Did you see that, Dave?" He would say. "That looks like about 5.6 at 400 to me..."

Uh-huh. Sure it does, Mr. Walther. If you say so.

I was never completely sure when the guy was kidding or serious. He was a legend as far as black and white technical quality was concerned. I swear, the guy could look at a tray of crystal clear fixer and tell you how many more good prints it had left in it.

I'll never really know if he was pulling my leg. But the guy sure could light.

And he got me thinking, which might have been what he was trying to do in the first place.

Rewinding a little, I had a couple of heaters Lowel Tota-Lights (quartz lights) at the time. And I could use those just fine, because I could see the effect right there. But flash? No way.

Then one day, it occurs to me that I could previsualize what the quartz lights were gonna give me before I turned them on. Why? Because I had seen the effect so many times.

This is really nuts, if you think about it. I could previsualize the quartz lights before I had even turned them on, but I could not previsualize my flashes? (C'mon, Dave.)

Anyone knows what effect a flashlight will have when we turn it on. But a flash? Try to previsualize that and we suddenly turn dumb as a sack of nails.

Which is when it hit me. If I just imagined my little Vivitar (at the time) as a very powerful continuous light, I could previsualize what the effect of the light would be.

This was an epiphany for a dumb, green college shooter. And it worked. I could not judge the quantity of the light. That was what meters were for, before TFT sceens. But I could now prejudge the quality of the light. To some extent, I have been doing that ever since.

My mind applies a convenient little automatic dimmer to my mental Nikon Speed Light/Continuous Light. I'll take care of the exposure in a minute anyway. What is important to see is what the light is going to do, not how bright it will be.

Try it. Start out with hard light at first, because it is easier to visualize the effect. Then learn to think how restricted-beam (snooted) light will act. Then soft light.

Bouncing flash against a wall? Imagine a window right there. You'd be surprised how you brain will start to register how the light will look.

And getting back to Mr. Walther, I think he was onto something.

When you choose the zoom/lens coverage setting on your flash, for instance, it will affect the size your light source. (The light source is now the bounce surface.) Pop the flash while looking at the wall. Sure, it only happens in a 10,000th of a sec, but you can see it because it burns a momentary image into the rods and cones in your eye.

Where does the light hit? How big is it?

What would the light from a window that size and location look like on your subject?

Starting to get the idea?


__________

New to Strobist? Start here | Or jump right to Lighting 101
Got a question? Hit me on Twitter: @Strobist
Have a passport? Join me in Hanoi: X-Peditions Location Workshops


Permalink

Reader Tip: Foiled Again

Thanks to James Dyrek, who sent in one of his favorite lighting ideas:

Aluminum foil.

He puts it on computer monitors to make an efficient bounce surface for a low power flash, like a Vivitar 285 on (partial) manual power.

Foil is cheap, light and takes up almost no space in the bag. Triple aces on the Strobist scale.

You can use the stuff for mold-able GoBo material in a pinch, too. Or if you are using optical slaves that are being finicky about firing, you can make a little "scrunchy light reflector" just to catch and kick a little light into them.

For not weighing anything, that's some heavy metal.


(Thanks, James!)


__________

New to Strobist? Start here | Or jump right to Lighting 101
Got a question? Hit me on Twitter: @Strobist
Have a passport? Join me in Hanoi: X-Peditions Location Workshops


Permalink

Strobist Guest Book and Reader Links

If you would, please take a moment to add a comment with your name and personal info to our book. I have been getting e-mails from many different parts of the globe, and I thought it might be interesting to see just how diverse a group we are becoming.

Nothing fancy - just your name, location, what kind of photography you do and a link for your website or blog if you have one.

I will try to migrate the links up to the actual post (the part you are reading now), unless we get so many that it becomes impossible to keep up.

Thanks, y'all!

Readers' Links:

Shane Porter - The "SP" in EssPea...
Kirk Tuck
Erez Avraham
Hub Pacheco
Alan Ackoff - New Mexico Photo
I Shoot People - New gear blog with a forum
Pete Millson
EOS Pro - Daniel Kasaj's EOS gear blog
Movin' to Seattle - Matt Swann's blog
Hassel Weems - AKA World Wide Weems
David H Photography (A different David H.)
Mike Sebastian
Josh Wand - Digital workflow; Post Production
Steve Mermelstein - Commercial, Weddings, Portraits, and Landscape
Nick Wright - Community photojournalist's blog
Patrick Wellever - Michigan State University PJ student
Bob Samuelson - Photographer, retired engineer, DIY guy.
Marcus Hartel - Street photographer
Morgan Petroski - Photojournalist and a 'Gator. Double threat.
A Pentax Fan Blog - from a guy with no name...


__________

New to Strobist? Start here | Or jump right to Lighting 101
Got a question? Hit me on Twitter: @Strobist
Have a passport? Join me in Hanoi: X-Peditions Location Workshops


Permalink