OK, Let's Give It a Whirl

You guys seem pretty unanimous, for a group that does not yet know what they have gotten themselves into, (heh, heh.)

I will plan out a group of, say, half a dozen assignments. Expect the first one in a couple of weeks, as more than a few of you have recently ordered some new gear and may just be getting used to it.

I used to do something like this back when I taught at a local college, and it always amazed me to see what students came up with within the constraints of the assignments. The restrictions will definitely help you focus your efforts.

Broad strokes, here is how it'll work:

I will come up with a list of assignments. They will start easy, and get progressively more involved. Each assignment will have a subject matter/theme/genre. Each assignment will also be shot using a particular off-camera skill, to be explained when the assignment is given.

Each assignment will have a deadline. Probably in the neighborhood of two weeks. Participation is, of course, voluntary, but deadlines are deadlines.

No pre-existsing photos, please. You're on the honor system on this one (although I suppose we could check EXIF data if pressed.) Most of the assignments will be specific enough as to make this rule difficult to circumvent, anyway.

I am going to try to hit my vendors up for a couple of interesting premiums for, say, the best three overall photos from the entire course. If I am not successful at this, we will get a little creative and see what we can come up with.

To "turn in" the assignment, you will simply post it to the Strobist Flickr group, with the assigned tag. That way we will all be able to easily pull just the pictures from a particular assignment to look at. I have checked this out and it works great.

Here's the first curve ball: For each assignment, you turn in one picture. No more, no less. This is not as draconian as it sounds, as it is easy to change tags after the fact in Flickr, thereby swapping your entry. But I wanna see your "A" pic. You have to choose. This will keep the number of photos to a sane level.

So, let that percolate a bit, and please spread the word out in the ether before the start if you are able. We have a little time, and this could be a really neat project if we got some serious numbers participating.

In the meantime, I have an On Assignment almost ready to throw up on shooting strobe into the sunset. I would do it tonight, but I was out in the field shooting (literally, out in a field) and some nasty allergin of some sort had my eyes swollen up so much that they were darn near shut.

So, I am off to take a Benadryl (or two) and sleep the sleep of the drugged for as many hours as I can string together tonight.

I'm really looking forward to this. Should be fun, and yield some great dialog once all of the photos are posted each time.


__________

New to Strobist? Start here | Or jump right to Lighting 101
Got a question? Hit me on Twitter: @Strobist
Have a passport? Join me in Hanoi: X-Peditions Location Workshops


Permalink

Floating an Idea: Lighting School

The Lighting 101 lessons are all up, and many of you are doing some cool stuff. With the large number of people posting to Strobist's Flickr group, I am toying with the idea of creating a more structured lighting program that involves reader participation.

How would you guys feel about a monthly, technique-specific assignment? For many people, this is the kind of thing that provides enough of a kick in the pants to go out and do something. And the fact that you would all be trying out a similar technique at the same time would allow you to compare your execution with that of many others.

The technique would start out pretty simple, and build from there. Certainly for the foreseeable future, we would be talking about stuff that could be completed with the most basic Strobist-style gear.

Results would be posted (with appropriate tages) in the Flickr Strobist group pool.

There would be very modest token prizes involved for the standouts. (Hey, I'm barely treading water as it is, folks...)

Whaddya say? Does that sound interesting?

Leave me some feedback in the comments section if you would be up for it. I will decide yay or nay based on the level of interest.


__________

New to Strobist? Start here | Or jump right to Lighting 101
Got a question? Hit me on Twitter: @Strobist
Have a passport? Join me in Hanoi: X-Peditions Location Workshops


Permalink

Bits and Pieces: Everything But the Kitchen Synch

There have been a lot of questions about synch cord odds 'n ends via e-mail, and in various comments sections. But it's core info and I wanted to bring it up to a main post.

• For those of you making the jump to Pocket Wizards, remember that you will need to connect the receiver to your flash unit. If you have a Nikon SB flash with a PC jack on the side, you'll want a PC1 (PC Male to Miniphone Cord) which you can get for $17.95, here.

• If your flash does not have a PC jack, you'll have to cough up for a PW-MHSF1 (Miniphone to Hot Shoe Female Cord) which you can get for $44.95, here. You will notice that the difference in the prices between the two cords - $27.00 - puts you well on your way to a used Nikon SB-24 with a little patience. I'm just saying...

• Nikon AS-15 Hot-Shoe-to-PC adpaters (see photo above) which have apparently been tough to find, are back in stock. Rejoice from the hilltops in a loud and mighty voice.


__________

New to Strobist? Start here | Or jump right to Lighting 101
Got a question? Hit me on Twitter: @Strobist
Have a passport? Join me in Hanoi: X-Peditions Location Workshops


Permalink

Adding (and Synching) a Second Strobe

In addition to being cheap, both the Starving Student Off-Camera Light Kit and the (included) Pro Synch Cord were designed to be expandable.

You start lighting things enough, and you'll get the itch to add a second light to your gear bag.

Getting the second light/stand/umbrella/etc. is easy enough. You just crack the wallet, take the hit, and go. And if you will be working at close range a Nikon SB-26 is an ideal second strobe, as it includes a decent optical slave to synch it to the first light.

But if one of your lights is not an SB-26, or you will be working at greater distances, or if you do not want others' flashes to set off your #2 light, you'll have to synch them via radio remote or hardwire. If you already have a set of Pocket Wizards, you can buy a second receiver separately for about half the cost of a full set. Problem solved.

But if you are working on a budget, the Pro Synch Cord is modular, and easily (and cheaply) expandable.

What you'll need:

• One more PC Male to Household Male synch cord: $5.95 at Adorama
• A three way AC splitter adapter: ~$2.00 at WalMart, Home Depot, etc.
• Two normal extension cords: $2.00 and up, depending on the length, at WalMart, Home Depot, etc.

If you have a couple of extension cords at home, you are out the door for less than $8.00. If not, these extension cords can do double duty at home for other uses. I saw a 50', heavy duty cord for $10 at Home Depot this weekend, so you can get your flashes far away from each other for very little money.

(You can also nix the 2nd cord by plugging your first PC Male to Household Male cord right into the splitter. Just ball bungee (or rubberband) the junction to your light stand for strain relief, just like we discussed on the PC cord page.)

The diagram shows what you need. If you have built a Pro Synch Cord, you already have everything in black. The blue stuff is the new stuff, and the diagram shows how it goes together. Click on it for a big version.

If it looks complicated, it's not. And cheap and reliable, too.

Three notes:

1) Feel free to snip off the grounding pin on the splitter (use needle-nosed pliers) so it will fit into your homemade female-to-female AC cord. Just do not use the splitter for actual AC appliances after doing that. Mark it with a sharpie to warn others.

2) Plug both of your PC/Household cords into the extension cords (or splitter) using the same orientation. This will make fore more reliabe synching, and be safer for your camera.

3) As always, avoid plugging older strobes (or big, studio strobes) directly into electronis cameras. They can fry the synch circuit. Nikon SB-24 and newer strobes are safe. Some older Vivitar 283's are not.

Labels:


__________

New to Strobist? Start here | Or jump right to Lighting 101
Got a question? Hit me on Twitter: @Strobist
Have a passport? Join me in Hanoi: X-Peditions Location Workshops


Permalink

Wear Something Flashy

At the suggestion of several readers (I have learned that you guys sure aren't shy about making suggestions) I have created a CafePress shop for Strobist.

For those who do not know about CafePress, it is a cool made-to-order shop on the web that has grown into a bit of a phenomenon. You can put artwork on darn near anything there.

For photographers, it is a cool place to sell prints, books, greeting/note cards featuring your photographs, etc.

I set up a few styles of Strobist T-shirts, sweatshirts, and a black baseball cap.

I drew the line at the thong, though. Not going there.

There's also a link on the sidebar to the right, which will remain after this post falls off of the front page.


__________

New to Strobist? Start here | Or jump right to Lighting 101
Got a question? Hit me on Twitter: @Strobist
Have a passport? Join me in Hanoi: X-Peditions Location Workshops


Permalink

When Are You Gonna Learn?

WARNING: This is an somewhat off-topic, Sunday afternoon stream-of-consciousness rant.

About 15 years ago, I was reading one of the early photo message boards on AOL.

Photographers - just like everyone else - were just starting to come together and share information in ways that had previously been impractical, if not impossible.

It was a fantastic experience. The cacophony quickly grew to include everyone from young photographers (such as myself at the time) to some of the best shooters in the business.

I would pore through the posts every day, gleaning whatever I could from other people's experiences. I know it's rote habit for may people today. But in the early '90's, it was all new. And I was a kid in a candy store.

A decade and a half later, one of the posts still sticks in my memory. Someone was going to China to shoot a conference of NGO's as the country was just really opening up to the integration of ideas from beyond the Great Wall. So they asked how others would approach covering the event.

As a very green photojournalist, my questions would be:

• What gear should I take?
• Do I need to buy anything for the trip?
• Will the water be safe to drink?
• How do I get access to the important meetings?

I could go on, but the embarrassing point is that I would have been concentrating far too much on the process.

Contact Press Images shooter Ken Jarecke answered the question in luxurious (for me) detail. And it completely changed the way I thought about my own approach to covering my assignments. Ken was thinking - out loud - like a photojournalist should be thinking:

• Where are the people in China whose lives could be changed by the NGO's new ideas?
• Given that the event will draw attention to China, are there people who are being displaced (or, "cleared away") to make a better looking stage for the event?
• Are there people who are going, but will be on the "outside?"
• Who are they?
• Why could they not participate?
• How will they be tweaking the system from outside?

This is a brief and incomplete list, but the point is that he immediately starting thinking in ways that would point him to better pictures, while I was wasting time on the low-yield details of the actual trip itself.

This exchanged opened my eyes to the fact that photographers who always seem to have a good batting average just think differently than the rest of the herd. And I began to realize that the biggest difference between Ken Jarecke and myself is that he thinks differently than I do.

It was a smack-my-own-forehead moment.

Do you think that way? If not, why not?

And when do you expect to start thinking that way?

I had what I thought was the luxury of youth on my side, assuming I would have plenty of time to grow into my job/career. After all, I was just out of college, so I could not be expected to think on such an efficient level, right?

Well, no. I now realize how stupid and wasteful it was to rely on my youth as an excuse for not having the mental work ethic that I should have had.

What separates you from the photographers you look up to?

Experience? Sure, that counts some.

Gear? OK, but to a much lesser extent.

But, for the most part, it's what they have between their ears. And how hard they are willing to work to use it.

The world great photographers are no different that the world's best athletes, business people, actors, chefs - whatever. They work hard, and they think hard.

And since being a good shooter (or a good "lighter") does not involve any special physical prowess, it comes down to your wrinkly grey matter and how you use it.

A few years ago I had the wonderful experienced of following Hairspray, a Tony Award-winning Broadway musical, from the very first rehearsal through previews (3,000 miles away from NY City) and on to opening night on Broadway.

Every person involved in the process was just sickeningly talented beyond belief. You know, the kind of people for whom everything seems so easy. Makes you wanna barf, right?

Well, those people - from the 14 year old kid in the cast, to the senior citizens - had one other thing in common: They worked their butts off every single day. I mean, I got tired just watching them.

Never was anything more clearly apparent to me: Even if you are talented, it is the hard work that pushes you to the next level. Every day.

You work hard and think hard? You raise the bar.

You slack off? You stagnate. Or worse.

For us, "working hard" largely translates to constantly toying with new ideas, trying new techniques, challenging the way we used to think about making photos. Even if "used to" was as recent as the last assignment.

How old do you expect to be, before you'll be making the types of pictures that you really want to make?

20?

30?

Why then? What will be different about you then?

Why wait for another stage in your life to happen and magically transport you to where you want to be?

The answer, of course, is that there is no reason to wait. A reasonably coherent 4th grader has the math skills to be a good shooter. And you do not have to be able to run a 5-minute mile to be a good shooter.

What you do have to do is to constantly chip away at what you do not know. You have to build your range of technique every day. You have to challenge yourself to think about your assignments in ways that will raise your odds of getting great photos.

You have to stretch yourself to grow.

You certainly can benefit from others' experience - be it through books, websites, movies, assisting - whatever.

Speaking of movies, you want to see what one incredibly talented man can do when he shows up ready to give his all, every day? Watch the DVD, War Photographer. I have never seen a better vicarious channel into the mind of an amazing shooter. It's kind of like the movie, "Being John Malkovich," except you get to crawl inside the mind of James Nachtwey for an hour and a half.

But then you have to go out and do it. Whether that means creating special projects for yourself, shooting assignments in different ways, spending a week with one small light and a small object to see just what you can do, or whatever.

You have to take the next step and apply what you are learning. The synergy of learning something and then experimenting with the new knowledge will create even more new pockets of experience for you to grow on.

If you are older, well, you're not getting any younger. Get on it.

If you are younger, that only means that you most likely have that much more time to get that much better. If you challenge yourself every day.

In 1998, I was teaching at a conference when I met Yoni Brook, an 18-year-old (at the time) whose photos blew me away. Three years later, I saw an iconic, post 9/11 magazine cover with (21-year-old) Yoni Brook's byline. Didn't surprise me a bit. Nor did it surprise me that he shot it with outdated film from the back of his fridge, snatched up as he was heading down to the site from his NY apartment.

So, when are you gonna learn?


__________

New to Strobist? Start here | Or jump right to Lighting 101
Got a question? Hit me on Twitter: @Strobist
Have a passport? Join me in Hanoi: X-Peditions Location Workshops


Permalink

Christmas in May

Happy, happy, joy, joy!

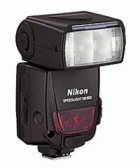
I just walked in to the office after a day's shooting and found that Santa Clause, (AKA Baltimore Sun equipment guru Jeffrey Bill) left two, (count 'em, two) Nikon SB-800 speedlights in my mailbox.

Don't get me wrong - I am still into the SB-24/26/etc. vintage Nikon flash thing. But I have heard so much about what these little uber-lights can do from many of Strobist's readers that I am itching to play.

Expect some test drives and write-ups soon.


__________

New to Strobist? Start here | Or jump right to Lighting 101
Got a question? Hit me on Twitter: @Strobist
Have a passport? Join me in Hanoi: X-Peditions Location Workshops


Permalink

Photo DIY Heaven

Strobist's Starving Student Off-Camera Light Kit (the name alone is sufficient explanation as to why I do not work on Madison Avenue) popped up, well, everywhere last week.

But no reference was more gratifying than on the Make: blog. For those who have not seen it yet, "Make:" is the coolest DIY mag going. I luv it, luv it, luv it.

In seeing where the SSO-CLK popped up, I found this page full of DIY projects. Way geek, way cool. The Home Depot-sourced (I get orange just thinking about it) bike steadicam bracket rocks.

Which, of course, is exactly what it is supposed to do.

Labels:


__________

New to Strobist? Start here | Or jump right to Lighting 101
Got a question? Hit me on Twitter: @Strobist
Have a passport? Join me in Hanoi: X-Peditions Location Workshops


Permalink

It's Easy to be PC.

This will be old news to many, but I get so many questions as to "how, exactly to hook an off-camera strobe up to my XXXX-model digital camera" that I am gonna post it anyway.

The Nikon AS-15 PC adapter will turn any hot shoe into a working PC jack. It's $20, and this is one of those cases where it pays not to get the $10 off-brand model, because this thing works.

I have gone through a few of the no-name brand ones back when I was using a camera that did not have a PC jack. I can tell you that the frustration is not worth the extra $10.

It is not TTL, which is good. That means it is agnostic as to camera brand, and will turn your digital-anything-with-a-hot-shoe into a much more capable camera.

Flying to another continent? Go coach, and save $1,500 bucks.

Adding a PC jack to your Nikon D70 or Canon EOS Digital Rebel? Go first class.


__________

New to Strobist? Start here | Or jump right to Lighting 101
Got a question? Hit me on Twitter: @Strobist
Have a passport? Join me in Hanoi: X-Peditions Location Workshops


Permalink

Strobist Hits Puberty

One of the best things about being a photojournalist is that you get to do a lot of fun stuff and call it work. Of all of the experiences I have had on the job, none was more consistently rewarding than teaching others the same way generous people had taught me.

FYI, I used to teach photography at a local college. But I gave it up to free up more "daddy time" when my daughter was born. She'll turn eight next month.

A couple of months, a made-up name and 114 posts ago, I started Strobist as a way to cure my jones for teaching without being tied to a rigid schedule. Turns out, my non-rigid schedule is now, "all of the time."

And a few minutes ago, the website recorded its 250,000th page view.

Yeah, I know some sites like Google might do that every tenth of a second. But to me, that's a big number. And I am very happy to see the milestone hit.

Further, it means that this work is somehow getting out to people. (Even if you subtract the page hits my mom probably clicked, there's got to be ten or twenty thousand hits left.)

For those who have joined Flickr's Strobist group, thanks much for sharing your stuff. It's great to watch readers learning from, and sharing ideas with, other readers. The group is becoming more and more organic every day. We may be doing this on a shoestring budget, but we are becoming a community.

And it's a lot of fun, too.

Keep those Flickr pictures coming. And I will, too.

-David


__________

New to Strobist? Start here | Or jump right to Lighting 101
Got a question? Hit me on Twitter: @Strobist
Have a passport? Join me in Hanoi: X-Peditions Location Workshops


Permalink

Lacrosse Head Shot: v2.0

A couple of weeks ago, I built the macro strip lights to solve a problem with a small product shot. But I was also thinking that they might come in handy in other situations.

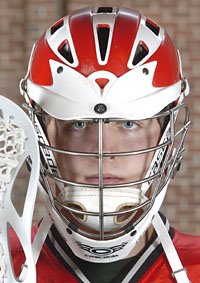
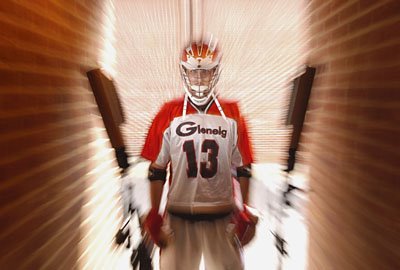
This week's cover shoot featured a lacrosse player in a helmet, and the strip lights were just the ticket to get some light up in there in a controllable way.

Additionally, this assignment is a good example of being flexible while shooting a pre-conceived shot. So I want to go through the shot process in a fair amount of detail.

Each feature assignment offers a full-page cover and a large inside photo that runs with the story. So we know just what kind of play we are going to get, and can plan the shots accordingly.

That tends to lead to a decent amount of preconception on my part, as I usually do not have a lot of time and want to be able to pull off both shots without spending too much time with on-site planning.

So, with several ideas floating around in my head, I arrived at the high school to shoot the cover. The pre-conceived ideas all involved using lights in an action shot on the field. Alas, I arrived just in time for the afternoon showers. Which nixed all of the on-field light ideas right away.

A hastily arranged "plan B" was to shoot him in a small portico that was very dark, except for an orange-ish sodium vapor security light up and to camera right. The background was a shade-lit brick wall in the distance.

I threw an 80-200/2.8, which is my bread-and-butter portrait lens, on a D2h and set up in the portico.

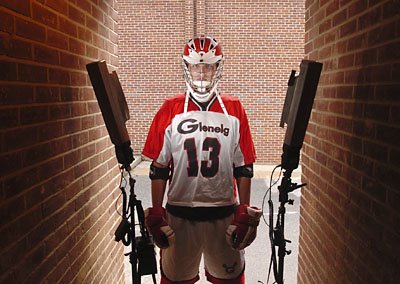
For the first attempt, I positioned two Nikon SB-26's on manual (in the strip lights) oriented vertically. I quickly saw that including the lacrosse stick ruined the symmetry of the picture. So we lost the stick right away.

The lights got up under the helmet, but looked better when lowered and shot at an upward angle into his face. I exposed the ambient for the brick wall (in back) at 1/250th, to get my easiest aperture for the flash to balance. He was heavily shaded by the portico, so the flashes were lighting a relatively darkened subject, which made the two different planes very easy to control.

Next, the flashes were balanced with the ambient background, which put me at 1/4 power (on manual.)

Everything fit, exposure-wise. But I did not like the bricks being so literal in the background.

The easy solution was to crop in some. I am a big advocate of getting anything out of your photo that does not help it.

This worked, but I didn't like losing the context and lines of the full helmet. And the background was in the same color family as the guy's school colors, so it seemed a shame to waste it.


The portico was dark enough to allow me to open the shutter on the background with little foreground effect, so I opened up to 1/30th to abstract the bricks a little.

I could see that I was getting closer, but still no cigar. I liked the colors, but I did not like the idea of an easily identifiable brick wall background in an iconic head shot.


So I started jerking the camera left to right as I shot. This brought the expected odd looks from the subject. But after I explained that I was doing it for effect (and not having a seizure) he understood.

Closer, but not there yet.

The next change was to try to zoom the lens during the exposure instead of jerking it.

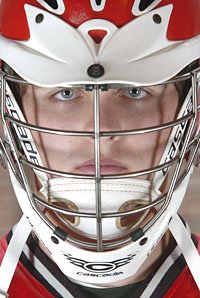
That worked, and produced the photo you saw up top. It connoted motion, and made the bricks an abstract design that kept the school color scheme.

Here is the lighting set-up, shot static at 1/250th.

And here is the same tell-all shot with the shutter opened up, and with a "zoom pull" during the exposure. Note that I went from wide-to-tele while zooming. Also, you'll want to start a little too wide, and be in the process of zooming while you press the shutter.

Total time to set up lights was about 5 mins. Total time to complete the shoot after that was another 4 mins.

When you are working with small, light equipment that needs no A/C power, you really can do something cool in next to no time.

I am happy with this shot for a few reasons.

First, I liked the idea of pulling together a "plan B" when the rain came.

Second, I like the progression of keeping what was good and changing what was bad about the photo on a quick, real-time basis.

Third, I love the dual strip reflection on the face mask. Takes a problem with lit helmet shots and turns it into an asset. Look almost gladatorial, if that's a word.

Room for improvement? Yup. Always is.

On a do-over, I would have worked his expression a little, to go with the dynamic lighting theme.

I might have warmed the flashes up a little with a 1/2 CTO, too. Just personal preference. I warmed his face up a tad in Photoshop for the final. But this is one of those shots where you could have gone a little over-the-top with the gels.

So, that's it. All over but the commenting. Questions? Answers? Rants?

Fire at will.


Next: Free Custom Backdrops: Using Flash into a Sunset


__________

New to Strobist? Start here | Or jump right to Lighting 101
Got a question? Hit me on Twitter: @Strobist
Have a passport? Join me in Hanoi: X-Peditions Location Workshops


Permalink

DIY: Digital EOS Holga

UPDATE: You do not have to DIY this now if you do not want to. You can buy it, ready-made, for less than the DIY version would cost. Sweet. See update at end of post. -DH

OK, so maybe this isn't really a strobe thing at first glance.

For those who do not know, Holgas are the funky, artsy, cheapo, 2 1/4 format plastic cameras that have many people diving back into the soft, light-leaky retro look.

Looking at the photos from this hybrid Digital EOS/Holga got me to thinking how great this could look with some hard flash thrown in there mixing with the ambient. The plastic lens distorts and softens hard light into something ethereal and beautiful.

Photographer Joachim Guanzon has mated a real, sawed-off Holga lens to a Canon digital camera. Even better, he has set up a web page to teach you how to do it yourself. (To any lensmount, really.)


The above pictures are not from an actual Holga, but from Joachim's digital hybrid version. You either love the look or you hate it. Personally, I think there are times when it can be awesome.

You'll need to buy (or find) a Holga and destroy it to make the hybrid. It's ok - they are very cheap. You'll also need a Dremel tool, (or a file and a heckuva lot of patience.)
__________


UPDATE:

Since this post first appeared, there has been a cottage industry in mating Holga lenses to the body caps of popular cameras. They are ready-made, and cheap—as in just $25. You can get them for Nikon or Canon, shipped Prime from Amazon.

I have used them on Nikons, and currently use them on my Fuji mirrorless cameras. You can easily adapt the Nikon or Canon versions to nearly any mirrorless mount adapter, which are also pretty cheap. (Example linked is Nikon-to-Fuji).


This lens, along with hard lighting, is a technique I use pretty frequently to get a different vibe to a portrait. And it is as easy as swapping lenses and putting a super-cheap piece of plastic on that expensive camera.

(Click on either of the two photos just above for a full On Assignment post on how they were made.)


__________

New to Strobist? Start here | Or jump right to Lighting 101
Got a question? Hit me on Twitter: @Strobist
Have a passport? Join me in Hanoi: X-Peditions Location Workshops


Permalink

The Great Flash and Glass Garage Sale

All around the world, photographers who used to shoot film have put away their fancy SLRs and zoom lenses and rediscovered the joy of photography with sleek little digital point-and-shoots that fit in their shirt pockets.

The image quality of many of these pocket cameras rivals that of pro digital SLR cameras from as little as a year ago. So people are bailing on their heavy, film-based systems in favor of the tiny consumer digital cameras.

Which is a wonderful thing. Why?

The ripple effect is that you almost can't give a film SLR away on eBay these days. In fact, the film-camera albatross hanging around the neck of many sets of photo gear means that the selling price of the gear with the film camera is frequently much less than the selling price of the individual pieces of gear had they been sold without the film camera.

And those sets usually come with a flash you were gonna buy anyway. So here is how to hunt for the flash you want and a bonus set of prime zoom lenses at fire-sale prices.

I'm going with Nikon here, because that's where the good flashes are. Start with an eBay search that includes every model of flash you would be able to use as part of an off-camera lighting setup. Be sure to include "search descriptions," because what you are looking for is a flash you would buy anyway, coupled with a few lenses. And a film camera keeping the buyers away.

Try this link on eBay to start.

(You could do the same thing in the newspaper classifieds, Craigslist.org, or anyplace else.)

No one is buying film cameras anymore. You can't give one away. But that outfit - minus the film camera - is exactly what you need to create a gear bag on the cheap.

I have seen N90's with three Nikkor zooms and a great flash go for less than $250. Take out the money you would have spent on the flash anyway, and the Nikkor zoom lenses are going for about $50 each.

Boo-ya.

What to do with the film camera? Keep it as a conversation piece, bookend, object d'art, whatever. Give it to a kid to take apart just for the experience. No matter. It's worth less than nothing.

Remember - the flash (along with a stand) is the major component in the Starving Student Light Kit. The rest (including the stand) goes for about $115.

Say you come up with a used D100 (or D70 - I'm learning, here) for $300. Now, with the garage sale, you have a semi-pro digital camera, a set of lenses and an off-camera light setup for $665.

Heck, you could set up a day doing headshots of local real estate agents and make more than your whole gear bag cost before lunch. Just shoot 'em, photoshop the best frame on the spot - taking out wrinkles right up to the point that strains credibility, and burn them the disc while they write you a check.

(We're talking paying for a gear bag here, not photojournalism.)

The point is, that thinking creatively on both ends can quickly set you up with the gear you need to do the kind of shooting you want to do. Without the tapped student loan or credit card.

Now, take all of this with the caveat that you may be bidding against each other if you all try to cut in line on eBay. Take it slow and wait for a deal. They are out there.

So, I told you mine. Now you tell me yours. Do you have gear-snagging secrets?

Share the wealth in the comments section.


__________

New to Strobist? Start here | Or jump right to Lighting 101
Got a question? Hit me on Twitter: @Strobist
Have a passport? Join me in Hanoi: X-Peditions Location Workshops


Permalink

Paging Doc Edgerton. White Courtesy Phone, Please...

Sorry, this isn't the Glass 'n Flash Garage Sale post that I promised. I am traveling this evening for an early morning assignment, so I'll do that tonight from my hotel room.

This is just a little quickie for those who might be interested in playing with their flashes as a motion-stopping toy. It was flipped to me by a Flickr user (Thanks, Amery!)

"Make Magazine," a cool little DIY-oriented periodical, had a piece in '04 on how to make your own high-speed flash trigger a la MIT's famous Harold "Doc" Edgerton, who did all of those time-stopping photos of a bullet piercing a playing card, droplets of milk, etc.

There is also a company that sells the little electronic flash controller for $100US, if you want to play but are not quite geek enough to build your own.

This is ideal for stopping time during one-time events, such as a drop of water making a splash, or a balloon popping.

For continuous actions (such as water from a low-flow faucet mixing with air as seen at left) you can simply shoot it with your off camera flash and get neat stuff, too.

Remember to use your flash on manual - on the lowest possible setting - to get the shortest flash duration possible. A couple of 10,000ths of a second matter when you are stopping motion.

For this photo, I just had the flash sitting on the edge of the sink at 1/64th power. I was playing with it for a story I am doing on how to conserve energy to beat rising electricity costs in the Baltimore region.

(The top photo is from the flash kit website.)


__________

New to Strobist? Start here | Or jump right to Lighting 101
Got a question? Hit me on Twitter: @Strobist
Have a passport? Join me in Hanoi: X-Peditions Location Workshops


Permalink

A Rational Approach to Buying Gear

Twenty something years ago, when I was just breaking into the field, things were so different.

Thirty-five millimeter film was the format. And as now, most all PJ's used Nikon or Canon. Sure, some went with Leica range-finders if their style (and wallets) permitted. But for the most part you got married to the Nikon F (or Canon FD) lens mount and your big decision was made.

It was all about the glass. Film cameras were nothing more than fancy little light-tight boxes when it really came down to it. Metering modes, frames-per-second rates, durability - all that was secondary to the quality of the glass you were sticking in front of the black box.

Now, everything has changed. Glass is is either very good, or very, very good depending on how much you spend. You can get f/2.8-and-tack-sharp at nearly any focal length if you are willing to crack open the wallet and lug the heavy glass around.

These days, TTL-flash standards and compatibility seem change more often than I change socks - which is one reason I like to stick with simpler approaches to strobe technique.

We have already talked about a cheap way to put together a light kit. But judging from the e-mail I get, many of you are facing similar decisions when choosing digital camera bodies and glass.

For new professionals, gear decisions are tough because you feel like you have to be ultra-equipped to go up against your competitors. (Not true, by the way. But you feel that way.) That's a lot of pressure to spend heavily before you know whether or not you will make it. In my experience, Nikon and Canon both end up with a lot of student loan dollars, simply because the shooter had no other choice.

For amateurs and hobbyists, it is hard because you are not getting any real income to justify the photography black hole you have created for your disposable income.

Having made plenty of gear-buying mistakes myself, here are my thoughts after twenty-plus years of experience and much wasted money.

The first thing you have to do is to define some sort of equipment compass point for yourself.

Are you a budding (or aspiring) pro? Are you going to eventually be outfitted to the nines? Gonna cost a lot of money. You'll want to get there in a way that wastes as little of it as possible. And if chosen wisely, your early purchases will have a second life as backups for your ultimate heavy-use selection of gear.

As individual digital cameras have much more influence over the quality of the final photos than did their film-based predecessors, you have to think about where you want to start on the quality/price curve of digital bodies.

(From this point on, I am using Nikon as an example, because I have not shot Canon since shortly after EOS made its first appearance. If you shoot Canon - not that there's anything wrong with that - do some research and you quickly find the equivalent path for your brand.)

Right now, if I were just starting out, I'd be looking at Nikon "prosumer" bodies. They get the benefit of the trickle-down R&D from the pro bodies, at a small fraction of the price.

Beyond that, I would be looking at a one-generation old prosumer model, which would mean the D100 at the time of this writing. Alternately, you could look for a two-generation-old pro body, such as a D1h or maybe a D1x.

But bear in mind that you might wind up with the heavily used body of a former pro. Which could be a little like getting a liver transplant from Keith Richards, if you know what I mean.

The more I think about it, the more I'd look for a nice looking D100, hopefully from an amateur (low miles) who is jonesing for a D200. Searching eBay, and internet photo retailers makes it easy to troll for a used body in your price range.

Is it gonna give you pictures as good as a D2x? Nope. But for about $500.00, it can get you into the game for way less money.

And here's the kicker. If you are lighting your work well, you will take the already very good files of a prosumer camera like the D100 and kick them up a couple of notches. You'd be surprised at how much better a well-lit D100 file can look that a poorly (or not at all) lit D2h file, for instance.

One downside is that the D100 (and most other prosumer bodies) does not have a PC synch. But that is easily remedied with a $20 Nikon AS-15 adapter, (where to get it) which will convert any hot-shoe to a PC-synch terminal.

If you wanted to start a little further down the scale and go with, say, a D70, this would get you a PC synch, too. Come to think of it, the AS-15 deserves its own post. I'll pop it up soon.

Speaking of the D70, you have to remember to to a little Googling to find out what lenses are compatible with what bodies. Some of the lower SLR digitals will only take special "digital" lenses. Yes, that's a crock. But you'll want to make sure all of your bargain gear will get along with each other. Try DPReview.com - they are a great resource for doing that kind of homework.

So, for about $660.00, you have a body and some light, as detailed in the "Starving Student Light Kit" post earlier. The prosumers tend to come with fairly weak, built-in pop-up flashes which will help you with the on-camera stuff in a pinch. But the idea will be to combine the inexpensive camera with well-crafted off-camera light to push the results beyond what you would normally expect from such a body.

Next, you'll need glass. (Sorry. "Lenses," for the foreign readers who have enough problems with English without my resorting to jargon.)

My strategy here is to buy decent glass that will cover your most-needed focal lengths without breaking the bank. Then, when you get more money to buy the high-end stuff (if you even want to) you can use your starter glass as backups or even as lenses for remote bodies.

Here, your choices will be defined by what you are shooting. But I really like the value of one or two slower zooms and a fast 50mm lens.

The zooms cover your focal lengths. And the lack of f/2.8 speed is not so much of a problem if you develop the ethic of a lighting photographer. They are cheap and will do until you have more cash.

The 50 is a great choice for a speed lens. Get a 1.8 (or 2.0) as this gets you into the low light range for a two-digit(!) price tag. As a bonus, with the digital camera's magnification (because the chip is smaller than the film was) a 50 is a good portrait lens.

And optical designers have been making 50's long enough to where it almost impossible to go wrong, optics-wise. Sharp, cheap, fast, small, lightweight. A great buy.

Later, when you have discovered more about your style (and preferred subject matter,) you can splurge on the fast pro lenses and use the cheaper stuff for backup. Or not. You may find that the lighter/slower/cheaper zooms suit you just as a shooter who adds light.

But the 50's and small zooms represent an excellent value for the money.

Even more so, when you find out where and how to get them - along with a flash made for off-camera light thrown in - for almost nothing.


Coming next: The Great Flash and Glass Garage Sale


__________

New to Strobist? Start here | Or jump right to Lighting 101
Got a question? Hit me on Twitter: @Strobist
Have a passport? Join me in Hanoi: X-Peditions Location Workshops


Permalink

Strobist's Flickr Group: Really Kickin'

OK, folks.

I appreciate very much your posting your own flash pictures in the Strobist Flickr Group. But I very much do not appreciate your posting pictures which show up the stuff I am putting up. Makes me look bad.

Kidding, of course. Really nice stuff. Keep it coming.

And if you haven't been there, check out the group's work here.

And as soon as I finish up with my Preakness shooting, I'd like to pull a couple of them up to post as "On Assignments" here on the main site.

-D


__________

New to Strobist? Start here | Or jump right to Lighting 101
Got a question? Hit me on Twitter: @Strobist
Have a passport? Join me in Hanoi: X-Peditions Location Workshops


Permalink

Bits and Pieces - May 20

Hey, folks. My head is spinning from a series of 12-hour shooting days, and I still have one more to go. Off today to shoot the Preakness (a big horse race, if you are from out of the US.) It's the second leg of the Triple Crown and I am glad the third leg is not my responsibility to cover.

Coming in the next few days when I come up for air is the first installment of a series on designing a "long-term gear plan." Bags so so expensive to put together these days, so you want to get the most bang for the buck.

Also, I shot a cool Varsity cover using those new little macro strip lights on Thursday. Just trotted them out for a headshot on a lark, and they worked better than I hoped. I have several "thought process" pictures, and an overall of the lighting setup, too. Trying to remember to do that every time now. Gotta wait till it gets published (Weds) but that'll be a new On Assignment post coming up.

I am swamped with e-mails, too, and will dig out of the hole ASAP-est. Thanks for your patience.

Still kicking (barely)
-DH


__________

New to Strobist? Start here | Or jump right to Lighting 101
Got a question? Hit me on Twitter: @Strobist
Have a passport? Join me in Hanoi: X-Peditions Location Workshops


Permalink

Round Up: The "Starving Student" Off-Camera Light Kit


This is the basic Strobist kit I toted around as a photojournalist for 20 years. Doesn't look like much, does it? But you sure can do a lot with it.

The gear seen above is mostly out of date now, as this post was originally written in 2006. But I have updated it in Lighting 101, with specific, current recommendations. You can see that, here.


__________

New to Strobist? Start here | Or jump right to Lighting 101
Got a question? Hit me on Twitter: @Strobist
Have a passport? Join me in Hanoi: X-Peditions Location Workshops


Permalink

Straddling the Line Between Genius and Insanity:

Oh, yeah. I laughed, too.

But I'll give Juergen Specht this much: I'll bet he has no problem getting a smile out of his subjects.

And when his off-camera-lit shooting session is threatened by rain, well, who's laughing then, huh?

Huh??


:: A Photographer's Quest for Perfect Light ::


__________

New to Strobist? Start here | Or jump right to Lighting 101
Got a question? Hit me on Twitter: @Strobist
Have a passport? Join me in Hanoi: X-Peditions Location Workshops


Permalink

DIY Macro Strip Lights

UPDATE: Here are these macro strip lights in action, used on a sports section cover shoot.
__________

I am batting around an idea for a pretty cool illustration. It's a macro shot, and it involves some fairly tricky lighting. I could give you more detail, but then I'd have to kill you.

Since I haven't shot (much less had published in the paper) the illustration, I can't really throw the idea or photo out here yet. My kids do so enjoy eating, and you guys don't pay squat. So the paper still makes the rules. And Rule Numero Uno is that it runs in The Sun before it shows up on Strobist.

But that's not to say that I can't do a little thinking out loud on the problem-solving process. And this shot sure has plenty of problems to solve. Here is my take on one of those problems.

I am going to light it on three planes. And the light from each plane will need to be kept from spilling onto the other planes.

To that end, I need light for the bottom/sides of the subject that will wrap around it horizontally, yet not spill up towards the top vertically.

I need a light that is hard (and "featherable") in the vertical direction, yet soft in the horizontal direction. In short, I need a tiny little strip light.

At times like this I call the entire Strobist R&D team into action, with orders to spare no expense in the creation of this one-off (actually, two-off) lighting tool.

Thus, only the finest cardboard (that I can find in my closet) and gaffer's tape was used. Not trying to impress you here, but the budget for a custom lighting tool such as this can run upwards of forty to fifty cents.

Hey, good light ain't free.

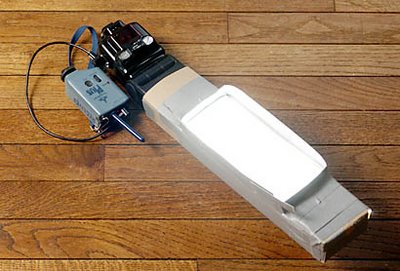
All kidding aside, what we have here is basically a set of modified cardboard snoots. I made them out of a shirt box (used, of course) a sheet of typing paper and some gaffer's tape.

I made them "inside out" so that that shiny white cardboard side of the shirt box would be on the inside, to bounce the light around more efficiently.

I basically made a set of rectangular snoot-type tubes and closed off one end of each tube (to keep the light from spilling out.) Then I cut a rectangular window in each, and covered that with a sheet of typing paper to act as a diffuser.

A little tape was used to hold the thing together. This was the last of my grey gaffer's tape - I'm getting black next time.

The tape ridges on the side are my best approximation of what I will need in terms of light spill control. This will likely be adjusted and/or augmented while I am shooting.

I like doing macro stuff because it is easy to make whatever kind or shape of light source you need on the fly, for next to no money.

Oh, and remembering that I am going to orient these things horizontally, I would point out that that is a really crappy thing to do to a hot shoe mount. And we are trying to keep those little buggars from breaking, remember?

The solution is to not use the hot shoes to mount the flash. I will likely bend them to about a 45-degree angle and bungee them to a light stand, using the interior angle of the bend to hold it to the stand with the ball bungee. I'll do pix of the set up with the time comes, and blog it when the story runs.

Now to solve my next problem: Making the object appear to float in mid-air...


__________

New to Strobist? Start here | Or jump right to Lighting 101
Got a question? Hit me on Twitter: @Strobist
Have a passport? Join me in Hanoi: X-Peditions Location Workshops


Permalink

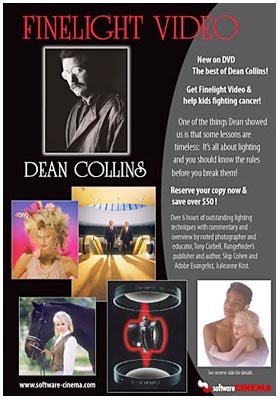
Dean Collins "Best of Finelight" Coming to DVD

I cannot put it any more crystal clear than this: Buy this DVD set.

You want to learn about light? This guy will teach you. His name is (was, sadly) Dean Collins, and he was one of my biggest influences early in my lighting days.

The subject is high-end lighting from the 80's and '90's. And truth be told, he is about as anti-Strobist as you can get, equipment-wise. But he knew his stuff better than anyone, and was one of the very best teachers I have ever studied - in any genre.

He studied with "the masters" in Europe (who only let him use one light until he could do an amazing amount of stuff with it.) He went on to become a master in his own right, and a very gifted teacher.

His use of humor and no-secrets style in the teaching process makes learning from him a fun and effortless experience. And he has so much to teach you. I owe much of my willing-to-try-anything attitude about lighting to this man.

He died last year after a brief fight with cancer. It was a great loss to the photo community.

And tonight I see where they have converted the highlights of his studio (and location) lighting tutorial series onto a six-hour DVD set.

The set will go for $179, but they are knocking $50 off of pre-orders before June here.

If you are interested in learning about light, there is nothing that I can recommend more that learning from this guy. In fact, if you have to choose, drop this site and learn from Dean.

The subjects range from large scale (as in, how to light a Porsche) to portraits (complete with dated '80's hair styles) and even macro stuff. The cameras were larger formats. The strobes were far more powerful than my SB's. But the theory is sound and very applicable to your daily grind. This is a base from which to build your own pyramid of lighting experimentation.

I am so glad they are bringing his work back for today's generation of photographers to see. If I can get ahold of an early copy, I will post a full review.

As he always said, learn the rules first. Then learn to break them.


__________

New to Strobist? Start here | Or jump right to Lighting 101
Got a question? Hit me on Twitter: @Strobist
Have a passport? Join me in Hanoi: X-Peditions Location Workshops


Permalink

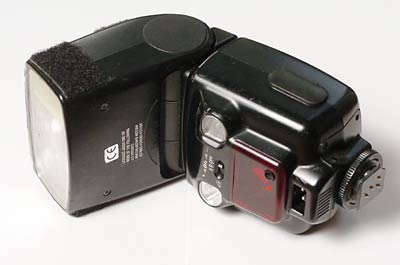
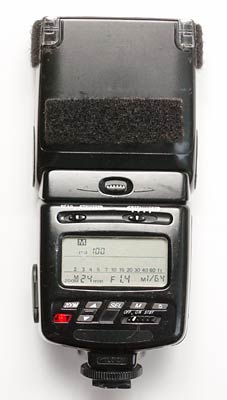
For a Few Dollars More: The Nikon SB-26

Anyone who has been reading Strobist for a while knows that I think the Nikon SB-24 is the best bet for the starving student's entré into the world of off-camera manual flash. With an external PC connection and full manual control over a 5-stop range, it has what you need without your paying for what you don't.

But for someone with a little flexibility in their budget, the more recent (circa mid-90's) SB-26 may be a better call. And if you are moving from just one flash to two, the SB-26 is a no-brainer. It can be had for around $100 at the time of this writing.

NOTE: If the earlier readers swoop in and snarf up the sub-$100 examples, don't blame me. Well, OK, I guess technically you could blame me, but they were just faster on the draw. So try to wait for more stock or troll eBay for a while to grab a good deal. But bear in mind that you are likely to be bidding against each other for the few days after May 15th, when this post goes up.

The SB-26 does everything the SB-24 does, plus the following:

• Full manual control over a 7 f/stop range.
• A built-in bounce card.
• A built-in diffuser panel for ultra-wide beam width.
• A "delay" function (more on that later.)
• A built-in optical slave. (Schwing!)

Now, before I go into detail on the features, I want to give you a word or two about keeping these vintage flashes alive.

First, USE THEM OFF CAMERA. I'm not making a value judgement (for once) on your lighting skills. It's just that the hot-shoe foot is the vulnerable point on these flashes. An SB-24, or -26, or whatever, could theoretically last you a whole career if it is happily firing on a stationary stand. That's because there is no torque on the hot shoe foot.

But if you are shooting on-camera, say, stalking Sean Penn or English soccer hooligans, well, that's another kettle of fish. You might catch an elbow (or a brick) to the head and your flash foot could go 'bye-bye' real fast.

Even if you use them on stands, a good policy is to not stick them straight out so all of the pressure is on a horizontally-mounted shoe foot. Mount them vertically (or as near to vertical as is practical) and use the swivel head to do the pointing. Way less torque. Way happier flash foot.

That said, if you snap one off, all is not lost. There is a good discussion (and link resources) for getting it fixed (even DIY-style) over at Sportsshooter. (Link will open in a new window directly to the discussion.)

Now, back to our regularly scheduled programming.

The seven f/stop range is really sweet, especially for close-up work. There are times when I have had to dumb that down even a couple more stops with neutral density filters. One-sixteenth power can be way too much at a few inches in distance.

The "delay" mode is, as far as I know, unique to this model of flash. Here's how it works. Say you are using an on-camera flash in the auto (or TTL) mode. You can use the SB-26 in manual mode stuck out in the background somewhere as a back/rim/whatever light and it will wait until the other flash has finished firing before it fires.

Why is this important? Because if it fired at the same time, it could screw up the other flash trying to work in its auto or TTL mode. (Usually this means the main light would not put out enough light. That's bad.)

How does it know when the flash is done? It doesn't. There is simply a "delay" switch on front of the flash. (Set it to "d.")

Does it matter what kind/brand of camera/flash is used for the auto/TTL front light? Nope. (Sweet, huh?)

What does this cost me? Well, other than a few bucks more to get this flash instead of an SB-24 (or -25) it costs you a third of a stop on your max synch speed. Most SB/Nikon combos max out at a 250th synch. This setting limits you to 1/200th, to account for the delay. Not an issue in the environments where you are likely to need to be filling dark backgrounds.

Now, for the other feature that makes this an ideal second light: Built-in optical slave. It'll see your other flash fire and fire the SB-26, either in "real time" or in the delay mode. For our purposes, it'll usually be real-time.

Now, this is not a fantastic slave. But for typical environmental portrait set-ups, for instance, it works great. You can help it along by making the SB-26 the strobe that fires the weaker light of the two, if there is a difference. Theory is, if one flash is going to set off the other (using light) you want the slaved flash to be receiving the bigger shot of light - not the other way around.

The other way to increase your efficiency is to point the front panel (that's where the slave eye is) of the SB-26 at the other light. Since the head rotates and tilts, this is almost never a problem. And of the SB-26 is firing into an umbrella, you're golden. That umbrella acts as a big relector, catching your main light and sending it right into the sensor.

These babies sold for $350 (and adjust that for ten years of inflation) back in the day. And now people have visions of "$B-800's" dancing in their heads, so they sell them for a song. Why, thank you, Mr. Rich Photo Hobbyist Guy.

All in all, a great little light. And believe me, if I was still looking to pick up a couple more of them, you would not be reading this article yet.


__________

New to Strobist? Start here | Or jump right to Lighting 101
Got a question? Hit me on Twitter: @Strobist
Have a passport? Join me in Hanoi: X-Peditions Location Workshops


Permalink

Right Back Atcha

I have gone through the Reader Links page and moved the (commented) URL's up to live links on the main post.

Some of Strobist's readers are doing some cool stuff, and you should check these sites out. And don't forget to add your info and URL in the comments section so I can migrate the links up to the main page next time around.

Click here to open the Reader Links page in a new window.

And, speaking of reader contributions, the Flickr Strobist Group is kicking some major buttocks, as Forrest Gump would say. We are one serial flasher away from having 75 members, with people sticking up new photos every day.

Boo-Ya.


__________

New to Strobist? Start here | Or jump right to Lighting 101
Got a question? Hit me on Twitter: @Strobist
Have a passport? Join me in Hanoi: X-Peditions Location Workshops


Permalink

Joe McNally Lighting Seminars at NPPA Convention

On June 23-25, Joe McNally will lead workshops on location lighting at the National Press Photographers Association's convention in Tampa, FL. Joe is one of the best lighting seminar guys going. He moves fast and gives out a lot of good info. (He's the guy who did the "Speed of Light" DVD.)

His seminars are highly recommended, as is joining the NPPA if you are a PJ type.


__________

New to Strobist? Start here | Or jump right to Lighting 101
Got a question? Hit me on Twitter: @Strobist
Have a passport? Join me in Hanoi: X-Peditions Location Workshops


Permalink

Bogen 3373's Back in Stock

Finally!

For the bazillion-or-so readers who have e-mailed me saying that those sweet little Bogen 6' Retractable 5-Section Light Stands were darn-near impossible to find, they seem to be back in stock. And in black, no less. (Although the photo shows chrome, the 3373 is black.)

It's about time. I've been itching to pick up a third one for myself.


__________

New to Strobist? Start here | Or jump right to Lighting 101
Got a question? Hit me on Twitter: @Strobist
Have a passport? Join me in Hanoi: X-Peditions Location Workshops


Permalink

On Assignment: Dealing With a Difficult Subject

(Photo by Ben Hobby)
You do enough assignments and soon enough you'll have to photograph someone who is (a) picky, (b) knows exactly how they think their photo should be shot, and (c) is not exactly giving you very much raw material to work with, if you know what I mean.

Such was the case for a young-but-enthusiastic Ben Hobby, 5, when I asked him to help me with my profile photo for the new Flickr Strobist Group.

It's Friday night and the missus is off on an overnight Brownie camping trip (big fun) with my daughter, Emily, 7. So it's just us guys. And we have full license to rearrange the living room. (As long as we fix it back exactly the way it was before the girls come home.)

This lighting scheme is a little unusual for me as I used no less than four SB-strobes for this photo. Which is about three more than my lazy butt usually drags out.

It is a continuation of my theme-du-jour, first explored in the Women's Lacrosse Portrait in the last On Assignment.

The kicker here is the background, which is a blank wall lit by an SB-24 (on a stand in a snoot) shot through a ficus tree. I love shooting strobes through houseplants to make interesting light. Luckily, my wife is a certified Green Thumb, or I would shooting light through a plastic house plant.

Technically, this is called using a "cookie," which is short for "cookaloris." And if this technique just got you wondering what else you could shoot a little strobe through to make funky light, well, you are starting to get it, my friends.

Anyway, here is just the background, which was lit by a strobe in a snoot high and to the right (as seen in the bottom photo below.) The pattern is always cool and infinitely variable, depending on where you place the light. Go wild.

(For a quickie one-light portrait, you can fire a single strobe right through the plant and stick a person in that funky light pattern. Just make sure they can see the light through the leaves. Then their eyes will be in the good part of the light, and not in a leaf shadow. Get them away from the wall to get their shadow out of the frame, though.)

And we could have done this with one light, too. But since Pizza Hut for-some-reason takes 45 minutes(?!?!?) to deliver to our house, we had time to do something more complicated.

Ben was a big help, moving the camera around and firing off plenty of test shots as needed while I set up the lights.

Then I would stick him in the chair and adjust the lights further.

If this looks a little 1940's Hollywood, that is because it is similar to the studio-mill "glamour-style" lighting of that era. It's totally cool/retro now (IMO) and a little edgier because a tight snoot (and no fill light) is used for the main light.

This wide shot shows everything. We have one light firing from high right at 1/4 power, through a tree to the background. A snooted SB on 1/16th power (slightly high and at camera left) on the face, and two snooted SB's at 1/64th power as back/rim lights (as in the lacrosse photo.) Click on the photo to bring up a big copy in a new window so you can see what all is going on.

The camera's shutter is set at 1/250th (for the top photo) to minimize ambient light contamination. (I shot at a slow shutter speed for the wide photo to bring up the ambient so you could see the light placement.)

One big mistake: The right backlight (the strobe, itself) cast a shadow in the ficus pattern that I did not notice until just as the pizza was arriving. I could have easily fixed it, but the pizza was hot and us boys were hungry.

Priorities, you know.

Camera: D2h
Lens: Nikkor 85/1.4; 17-35/2.8 for the wide shot
Exposure: 1/250 at f/8; 1/4 @ f/8 for the wide shot
Strobes: 4 (various model) SB units, on manual, on stands
Triggers: 2 on Pocket Wizards, and 2 (SB-26's) used their built-in slaves

Top photo © Ben Hobby - AKA "Strobist 2.0"
Other photos by David Hobby

Next: Lacrosse Cover, v2.0


__________

New to Strobist? Start here | Or jump right to Lighting 101
Got a question? Hit me on Twitter: @Strobist
Have a passport? Join me in Hanoi: X-Peditions Location Workshops


Permalink

Break Out the Popcorn...

Sportsshooter.com, (a great site if you are into the sports photo thing) has video online from a lighting seminar held a couple of years back. It's in 8 segments, and is not very dial-up friendly. But if you have the bandwidth, it is worth a look.

Link: 5-Minute Light.

EDIT: I'd be curious to know if there was enough info within the short time of the videos to be useful to any of you. Please comment if you have any info in that regard. -D


__________

New to Strobist? Start here | Or jump right to Lighting 101
Got a question? Hit me on Twitter: @Strobist
Have a passport? Join me in Hanoi: X-Peditions Location Workshops


Permalink

On Assignment: Women's Lacrosse Cover

Last week, when I wrote about the idea of keeping a lighting notebook, I mentioned that I was playing with the idea of creating a triangular, wrap-around style of light on the cheap.

The story ran, so now I am able to expand on the process and results.

This Varsity cover is on a high school lacrosse player whose family had immigrated (under duress) from Mauritania, in Africa. She's a sweet kid, and (apparently) a heckuva player. The day's schedule did not permit shooting her playing, so I did a quick cover and inside portrait.

The top photo is what was used on the cover, and I am (mostly) happy with it for a first effort. I still have much to improve, but that's what the next assignment is for.

I loved the look of the wrap-around style of light, but I wanted to do it with just a couple of SB's, so I had to use the sun as the third light.

This photo shows the effect of just the side/back lights, one of which is a flash on 1/4 power, and the other the sun. (On full power - hopefully - for all of our sakes.) The sun was popping in and out of the clouds, which made it a tad tricky. So I just shot quickly when it was out.

I liked the look on the TFT screen. But in retrospect, I should have made the flash more subtle. I also should have brought it (the back right one) up higher to better ape the angle of the sun on the other side. Oh, well. Next time.

The front light, seen added here, is another SB on half power (85mm throw) with a cardboard snoot. I also used a Rosco #08 warming gel to differentiate the light color from the side/back lights.

Next time I may carry that a little further by adding a cooling gel to the side/back lights for more light color contrast. We'll see.

This was surprisingly fast to set up. And for the limited amount of hardware involved, I thought the light looked pretty cool, and a little more "produced" than my usual fodder. I used Lumedyne batts on the flashes to get quick recycle times throughout the shoot. It's very nice just being able to shoot away as fast as I need at half power on manual.

As you can see by the wider shot (which I remembered to shoot this time) the back right light has a cardboard gobo to keep the light from spilling into my lens as flare. The gobo is on the side of the flash closest to the camera, if it isn't obvious.

As you have probably already guessed, the shutter was at a 250th, to keep the flash from having to work unnecessarily hard. I closed down the aperture enough to make the sky a rich blue and adjusted the flash outputs to bring the face (and head) up to the right exposure.

This was quick (and a little hit-or-miss) but it'll be a starting point for me next time and I will tweak it from there.

After shooting the cover as a vertical, I wanted to do a horizontal of her for the inside lede. I kept the snooted front flash in position (now a side light) and brought the (formerly) back right flash around to near the snooted flash give it a little more interest.

I think I turned it down too far, as I can barely see the double shadows on her face from what should be a bit of a rim light from this angle.

The light from the left (which is casting the ear's shadow and lighting all of her on the left side) is still the sun.

I am definitely gonna be playing more with this style of light, as I think it has a lot of potential. I may use light stand flashes for both of the back lights and superclamp strobes to the bottom of the stands, too, to act as bottom-back-rim lights. This could really accentuate the wrap-around effect.

Or it could totally screw it up. Only one way to find out.


Next: Lacrosse Player #2


__________

New to Strobist? Start here | Or jump right to Lighting 101
Got a question? Hit me on Twitter: @Strobist
Have a passport? Join me in Hanoi: X-Peditions Location Workshops


Permalink

Maybe I Should Just Take Up Plumbing

Last night, on a tip from a Strobist reader (thanks, Mark) I drove down to Washington, D.C. to hear one of my long-time photo idols speak. In the process I met a lot of great new people from the D.C. chapter of ASMP.

I have heard Gregory Heisler before, and knew he would be great. But I still wasn't prepared for the three hours of stunning portraiture he threw up there, peppered with non-stop anecdotes and stories that had us all laughing out loud more times than I could count.

On the one hand, it was so inspirational. On the other, it makes me wonder what a hack like myself is doing in the same business.

Please take a look at the stuff on his site, which comprises only a tiny slice of the lifetime of great work he has produced.

You'd think he might be standoffish, arrogant and guarded about his (many) trademark techniques. Nothing could be further from the truth. Fantastic photographer, and an all-round good guy. If you ever get a chance to hear him, do whatever it takes.

Check out some of his stuff here.

Oh, and lest you think he's getting that look with a huge view camera and $200k worth of light, know that he's doing much of his work with the same digital camera you guys are toting around - EOS's. And some small strobes, of course.

You try to tell the large format stuff from the Canon stuff. I gave up after guessing wrong more often than not.


__________

New to Strobist? Start here | Or jump right to Lighting 101
Got a question? Hit me on Twitter: @Strobist
Have a passport? Join me in Hanoi: X-Peditions Location Workshops


Permalink

MAHA 2700mAh NiMH Batts: What Have You Heard?

I am hearing that these are very good rechargeable batteries. Any of you guys have experience with them?

2700mAh is very high capacity for a AA NiMH battery, so they could be a very good choice for strobes.

Please let us know via the comments section of your experiences with them.

Here is a source to get them, if you are interested. They also have a great selection of rechargeable batts at good prices, and do not jack you on the shipping.

(Thanks, Alan.)


__________

New to Strobist? Start here | Or jump right to Lighting 101
Got a question? Hit me on Twitter: @Strobist
Have a passport? Join me in Hanoi: X-Peditions Location Workshops


Permalink

Nikon "Speed of Light" DVD Demo

If you haven't heard about this, it is basically Joe McNally (a really good shooter) using a handful of SB-800's and -600's in Gee-Whiz TTL mode to do a lot of stuff most people would need big lights for.

I had been going back and forth on whether or not to buy it. I probably will.

There's a Quicktime preview of the DVD here.

You can get it (in stock) here.


__________

New to Strobist? Start here | Or jump right to Lighting 101
Got a question? Hit me on Twitter: @Strobist
Have a passport? Join me in Hanoi: X-Peditions Location Workshops


Permalink

You Showed Me Yours, So..

Of all sports, daytime baseball may be the most difficult to light using a small flash.

Typically, in a little league stadium environment, I...

Nah! I'm just kidding.

No one, not even a sicko like me, lights day baseball. (Although Walter Iooss, Jr. lit the endzone of a Superbowl, once.)

I am just posting this to let you know that I have been going through the "photo streams" of some of the new Strobist Flickr Group members and seeing some cool stuff.

Truth be told, I haven't kept a portfolio in years. I know, I know. But I am lazy about that. My last job change was 7 years ago when I came to The Sun. And I am pretty sure I was hired for my dashing good looks, anyway.

I am only now entering clips again after stopping when my daughter was born to conserve some daddy time. She's in second grade now, so I'm giving it another spin.

That said, I am starting to look through my hard drive and stick some stuff that I like up on my Flickr account, to join the visual cacophony along with the rest of youse guys. I'll scratch around the archive system at the paper and find more stuff to stick up there as time permits.

If you have not joined the Flickr group yet, please consider doing so and sticking some photos up.

We won't bite. Promise.

(Did I get you on the strobing baseball thing?)


__________

New to Strobist? Start here | Or jump right to Lighting 101
Got a question? Hit me on Twitter: @Strobist
Have a passport? Join me in Hanoi: X-Peditions Location Workshops


Permalink

Check Out Flickr Strobist, Folks!

This is too cool.

There are 43 of you guys signed up already, with neat photos popping up left and right. This "world web thing" might not be just a fad, after all.

If you haven't checked out the new Strobist Group on Flickr.com, you can do it here.

Please join up and show us your stuff.


__________

New to Strobist? Start here | Or jump right to Lighting 101
Got a question? Hit me on Twitter: @Strobist
Have a passport? Join me in Hanoi: X-Peditions Location Workshops


Permalink

Nikon SB-800 Heaven

If you are a Nikon SB-800 owner, let me first congratulate you on your apparent disposable income level.

Now that we have that out of the way, you may be interested in this link:

SB-800 Resources (Thanks, Doug)

Also, if you are bored out of your gourd, here's a quick news flash:

You can play with an "interactive" iTTL Flash demo, which is on the Nikon Japan site. It, of course, uses flash programming. And this link will get you there in a, uh, flash.


__________

New to Strobist? Start here | Or jump right to Lighting 101
Got a question? Hit me on Twitter: @Strobist
Have a passport? Join me in Hanoi: X-Peditions Location Workshops


Permalink

OK, Folks, Strobist Flickr is Live

First of all, mucho thanks to 'Captoe,' who set us up with a group (and educated me as to how to use it.)

This is a place to stick you cool flash experiments - successes and interesting failures.

There's only one rule: The photos have to be "work safe." Which is to say that they won't get anyone who is browsing at their desk (when they should be working) canned for looking at your stuff.

In other words, while I am sure your main squeeze's (fill in body part here) looks great in your cool new light, this ain't the place.

That said, throw up whatever you want. You may note that Flickr does make the meta data viewable for many caption plug-ins. So if you are trying to protect the innocent with respect to names, etc., kill your captions before uploading.

Here's how to join the fray:

A) Join Flickr (for free) here.

B) Join Strobist group here.

C) Upload your photos:

• By browser: here.
• With the uploader tool: here.
• By e-mail: here.

D) Add appropriate photos to the Strobist group. (Either during the upload process, or later from the photo's page.)

E) Add tags. Tags are like labels or categories. Strobist photos might be tagged with pertinent words like snoot, gobo, hardlight, softlight, ambient, etc.

F) Follow the tips for a Happy Flickr Group here.

You're good to go. Please feel free to comment (be nice) on others' work. Trade ideas. Ask question. Answer questions. You get the point.

This page will be archived to the sidebar for future reference.

And again, thanks to Captoe. (Whatever a 'Captoe' is...)


__________

New to Strobist? Start here | Or jump right to Lighting 101
Got a question? Hit me on Twitter: @Strobist
Have a passport? Join me in Hanoi: X-Peditions Location Workshops


Permalink

Pocket Wizard Layaway Plan

I'll bet that headline got your attention.

It's a cheap teaser, but based in truth.

A Pocket Wizard set uses connector jacks that are like a set of earbuds, but in mono instead of stereo. They are called 1/8" mono plugs.

If you wanted to build a synch cord that would allow an easy transition to PW's, you could use a cheap audio cord as the middle part.

This would mean that the connector-end PC cords that you bought for your 1/8"-audio-jack-based, pigtail synch cord would fit your PW's when you were ready to step up to $330 of wireless synching bliss. You could also use it as a backup when the PW's batts went dead on you.

Ha, ha ha! Just kidding! Pocket Wizard AA's last 250 hours. That's ten days, turned on, in your trunk before you're in trouble. And if you go ten days without using them, you don't deserve them anyway...

(OK, sorry. I have to stop posting late at night...)

Ahem.

Anyway, I'll look into sourcing a 20-foot 1/8' extension cord and a female-to-female adapter to see if it is worth doing to save money in the long run. (You'd need the F-to-F adpater to make a "socket" at the male end of the cord.)


__________

New to Strobist? Start here | Or jump right to Lighting 101
Got a question? Hit me on Twitter: @Strobist
Have a passport? Join me in Hanoi: X-Peditions Location Workshops


Permalink

That Synching Feeling

Do you know what your camera's real synch speed is?

As you probably know, when you stick a TTL-compatible flash up on your camera's hot shoe, the two talk to each other and the camera limits your shutter speed to your highest full synch speed. Usually, this is 1/250th.

Well, the camera does not talk to a PW transmitter (or a garden-variety synch cord) so it does not know to limit the shutter speed. I was shooting at an assignment today using a strobe off camera and a Pocket Wizard as a trigger.

What I found (with a little popping and chimping) was this:

I could get full frame synch at 1/320th, most of the middle of the frame at 1/500th and a predictable and usable third of the frame - mostly in the middle - at 1/800th.

I don't know about you, but I get all tingly inside just thinking about what I could do with a 1/800th synch speed.

(Uh, I didn't mean anything weird by that...)

If you can put the needs-to-be-lit part of a subject in that third of a frame (like, say, the face of an outdoor portrait subject) you have effectively made your strobe more than twice as powerful. The higher shutter speed means you can drop the aperture, making less flash do more. Cleaner backgrounds, too.

I am going to do some real testing and stick the results up in a longer post, but you might want to play with your camera and see what it'll really do using this technique. TTL off-camera cord users need not apply. The body basically thinks there is a flash up there on top.

Yet another reason to get the flash off the camera. As if we needed one.


__________

New to Strobist? Start here | Or jump right to Lighting 101
Got a question? Hit me on Twitter: @Strobist
Have a passport? Join me in Hanoi: X-Peditions Location Workshops


Permalink

Flickr, It Is...

There seems to be a good consensus for Flickr. Captoe has already set up a group called Strobist here, prompting my crack team of copyright lawyers to fire up the fleet of black helicopters and head his way.

Actually, Captoe, if you want to handle the invite approvals and e-mail me with an easy instruction set telling people how to post the photos, I will set up that info on Strobist (the blog) and we can get busy.

One more thing. If you keep your photos sized at 400 (total) pixels on the long dimension, they will fit nicely on the blog should they happen to get brought over into an article or "how-to" post. At that size, it should be easy to jpeg them to get them down to ~75k.

I have seen other blogs (on Blogger) that have a little Flickr slideshow refer box thingie in the sidebar. So I will check into how to do that, too.

Please do not use the Flickr messaging system for any important communication. I will probably check it every leap year or so. (I need another in-box like I need a hole in the head.)

And, for the pop-culture-illiterate, (or foreign readers) "Help Me, Rhonda," was a song by the Beach Boys.

Thanks, guys!


__________

New to Strobist? Start here | Or jump right to Lighting 101
Got a question? Hit me on Twitter: @Strobist
Have a passport? Join me in Hanoi: X-Peditions Location Workshops


Permalink

Help Me, Rhonda.

Alright, folks. I am hoping the Collective Strobist Reader Brain Trust can yield an idea or two.

The goal: To set up a publicly available place for you guys to stick your lighting triumphs and interesting failures so we can all see them.

The venue: Not here. (Because it would drown me with work, cause me to neglect Mrs. Strobist and probably land me in divorce court.)

I don't use any of the online photo community sites, so I don't know squat. But I want readers to be able to submit photos to some sort of "Strobist account" somewhere, with the abilty for others to comment (and trade ideas) attached to the photos.

Got a suggestion? Fire away in the comments section, and we'll see what we can accomplish.

I'm all ears.


__________

New to Strobist? Start here | Or jump right to Lighting 101
Got a question? Hit me on Twitter: @Strobist
Have a passport? Join me in Hanoi: X-Peditions Location Workshops


Permalink

On Assignment: Use a Second Light to Create Tension

Back in the 1980's, I did a lot of freelance for a really visual, cutting-edge publication called "American Banker - Bond Buyer."

Now, if you were to detect a note of sarcasm on the visual quality of AB-BB in my voice, you just might be right. But the assignments were quick and dirty, they paid pretty well and those folks sure knew how to turn a photography invoice around fast. Which made them triple aces in my book.

Suffice to say that the assignments were mostly of the "white guys in ties" ilk. So variety wasn't exactly the strong suit there.

Being a young photographer, I would lug the White Lightnings to every job and usually blast it all to f/16, thinking that is where the quality is.

As is frequently the case when in the youth of our careers, my approach was all about power. But that was at the expense of subtlety, control and ceative use of tension.

A really nice lady whose name escapes me used to call in my assignments ("shoot this guy in this boring, florescent-lit office," etc.) and send me on my way. So I would drag the Big Lights out and softbox the guy to death, thinking I had done a fine job.

After a while, she started suggesting that I "stick a second light in there - in the back somewhere."

She knew what I didn't: That a second light, coming from a radically different plane, could help the photos to "pop" on a typical, high-dot-gain newspaper page.

What I see now is that I had plenty of light (too much, actually) but it tended to come from the same direction. When I used a second light, I would use it as "fill" for the main light. (Can't have interesting shadows, can we? No, no, no.)

So the light was there, but there was very little internal contrast (for lack of a better term) in the photo.

These days when I pop the second strobe into a photo, it is likely to be aimed right back at the camera. (Either my subject or something else in my photo is blocking the light from the camera's point of view.)

Sometimes I will use the second flash to light the background from an oblique angle. But either way I am creating a second plane of light that can be controlled independently to adjust the tension and internal contrast in the photo. This is especially important when your work is going to be reproduced in a newspaper.

You show me a photo with enough internal contrast, and I will show you a picture that will repro darn near anywhere.

In the top photo above, I used a standard SB-light-on-a-stand up high and at camera right. (Remember - check the nose shadows to see where the main light comes from.) This would have been okay, but adding the second light in the back really makes the wire spools kick. This company, by the way, runs Cat-5 wire and the like to install network for corporate clients.

When you are just starting out with this backlight stuff, the question arises as to how "hot" to make the light in the back. Fortunately, the answer is that it really doesn't matter. There is such a wide range of brightness (relative to your main light) that you can use. And almost anything you do is gonna look good. Honest.

Let's use this photo as an example. If you just wanted three-dimensional-looking wrap-around detail in your wire spools, you might start out with the background flash putting out the same light as the foreground.

But you could up the background flash by a stop if you wanted. Or two. Or three. And none of them would look bad. They would just look different. It's the closest thing you will ever get to a "horse shoes and hand grenades" fudge factor in lighting. Don't believe me? Try it and see for yourself.

And here's another trick. You know that CTO gel you keep religiously near your flash? You can warm up that back light to create some color contrast, too. (Don't try it with the green gel. It looks, well, rather pukish.)

Here's the process. This is a pretty dark room, so lets assume the ambient will not really come into play in the light, as long as we have a pretty fast synch speed.

I set my first flash up at 1/8 power (direct) and did a couple of test pops to nail down the working aperture. Then I stuck my other flash in the back, laying on a cable spool behind the guys. I set it to 1/8 power with a CTO gel on it and tested it by sticking my hand in front of the lens to block the background flash - just like my subjects would.

I do this nearly every time while checking the effect of a backlight. It saves wear and tear on your subjects as you can set up the light without them.

The light was fine as it was, but it looked even better when I cranked it up another stop. So I shot with the background light set to 1/4 power.

The seond photo is sort of a reverse of the first. I started with a light high and to the left (with a snoot) to pop the guy's face. I based the working aperture on him. Then I lit the computer equipment with a second light, testing popping and chimping until I got a good ratio.

Note: "Chimping" is a slang term in the US for digital photographers that shoot a picture and then hunch over their camera looking at the image on the TFT. They are frequently observed making sounds like, "Ooh-ooh-ooh," (not unlike a chimpanzee) if they like the photo.

Super accurate? Nope. But pretty darn close.

Quick? You betcha. These two were from the same assignment and they were both made in a span of about 10 minues.

It's funny, but now that I think of it I rarely use more than one strobe when I light. It's mostly because of speed issues, but also remember that I co-opt the sun or whatever other ambient is around to be my second light source by balancing as explained in Lighting 101.

This gets me through about 80% of my assignments, with another 15% being lit with two strobes and 5% being done with three or more. That is one reason I recommend adding a cheap, single-light bag very early in your equipment purchases.

You can do a lot with just one light. Just don't hesitate to stick the second light back there when it will do you some good.


Next: Womens Lacrosse Cover


__________

New to Strobist? Start here | Or jump right to Lighting 101
Got a question? Hit me on Twitter: @Strobist
Have a passport? Join me in Hanoi: X-Peditions Location Workshops


Permalink